
Fitness
Best Leg Workout Machines for Stronger, Sculpted Legs

Introduction
The Best leg workout machine for overall strength is the leg press. It engages the quads, glutes, and hamstrings all at once. The adjustable resistance lets you build muscle safely without overloading your back. That’s why it’s often the go-to machine for both beginners and experienced lifters. If you’re new to the gym, start with the leg press, leg extension, and seated leg curl machines. They’re simple to use and guide your movement, which helps you learn proper form. You’ll build strength and balance without worrying about free-weight coordination too early.
Yes, you can tone your legs using machines alone. Consistent resistance training with proper intensity builds lean muscle and burns fat. Combine that with good nutrition and moderate cardio, and you’ll see noticeable muscle definition over time even without a barbell in sight. Balanced leg training is more than just looks. Strong legs improve posture, stabilize your core, and support every daily movement from climbing stairs to carrying groceries. When your lower body’s strong, your overall fitness improves, and you’re less likely to deal with joint pain or lower back strain.
Why Leg Workout Machines Matter
Leg workout machines help you build strength, balance, and muscle definition safely. They guide your motion so you can focus on effort instead of form errors. That control lets you lift heavier weights and target specific muscle groups something that’s harder to do with free weights when you’re still learning. Leg machines also keep your joints aligned, which helps protect the knees, hips, and lower back. This makes them great for people returning from injury or those who struggle with stability. You can isolate weak areas, correct imbalances, and gradually build confidence under controlled resistance.
When it comes to free weights vs. machines, both have their place. Free weights train your stabilizing muscles and improve coordination, but they demand more technique. Machines, on the other hand, remove guesswork. You can hit each leg muscle directly without worrying about balance or spotters. For most people, using both leads to the best results machines for muscle building, free weights for functional strength. Leg machines matter because they make progress predictable. You can adjust the weight, track your reps, and see your strength improve week by week. That steady growth keeps you motivated and reduces the risk of burnout or injury.
Top Leg Workout Machines You’ll Find at the Gym
Most gyms have leg machines that target every major muscle group quads, hamstrings, glutes, and calves. These machines make leg day structured and balanced. Each one focuses on a specific area, allowing you to build power and shape without overtraining a single muscle. The key benefit of gym leg machines is control. You decide how much resistance to use, how deep to move, and how many reps to complete. Whether you’re training for size, tone, or stability, these machines help you get there safely and steadily.
Leg Press Machine
The leg press machine is one of the best for overall lower-body strength. It mimics the squat motion but keeps your back supported. You sit at an angle and push the platform away using your legs, working the quads, glutes, and hamstrings all in one move. Foot placement makes a big difference. Placing your feet higher on the platform shifts focus to your glutes and hamstrings, while lower placement targets the quads. Keep your feet flat, knees in line with your toes, and avoid letting your lower back lift off the seat. Slow, controlled reps deliver the best results.
Leg Curl Machine
The leg curl machine isolates and strengthens your hamstrings. These muscles sit behind your thighs and help bend your knees and extend your hips. Strong hamstrings improve running speed, stability, and overall balance. The most common mistake is lifting the weight too fast or arching the lower back. Keep your hips pressed against the pad, flex your feet, and move in a slow, steady rhythm. Focus on squeezing your hamstrings at the bottom of each rep to get full contraction and better strength.
Leg Extension Machine
The leg extension machine focuses on your quadriceps, the muscles in the front of your thighs. It’s great for building definition and power, especially when paired with compound moves like squats or presses. Sit upright with your knees aligned with the pivot point of the machine. Lift the padded bar until your legs are almost straight but don’t lock your knees. Locking can strain your joints and reduce muscle tension. Control the lowering phase, which builds muscle just as much as lifting the weight.
Calf Raise Machine
The calf raise machine targets the gastrocnemius and soleus muscles—the ones that give shape to your lower legs. Calf raises improve ankle strength and balance while adding symmetry to your leg development. There are two main types: standing calf raise machines, which target the upper calf (gastrocnemius), and seated versions, which work the deeper soleus muscle. To get full range, rise slowly on your toes, pause at the top, and lower your heels completely. Avoid bouncing the slower the lift, the stronger the muscle.
Understanding Leg Workout Machines Names
Knowing leg workout machines by name helps you train smarter and target muscles more precisely. Each machine has a specific role some build mass, others improve stability or shape. Once you understand what they do, you can plan balanced workouts that hit every major leg muscle efficiently. Many gyms use slightly different names for the same machines, but the movement stays the same. Below is a breakdown of common leg machines, what they do, and why they matter.
Smith Machine
The Smith machine is a guided barbell system that helps you perform squats safely. The bar moves along fixed rails, keeping it balanced and stable. This lets you focus on form without worrying about falling or tipping. It’s ideal for learning squats, lunges, and calf raises while keeping your joints supported.
Hack Squat Machine
The hack squat machine mimics the motion of a back squat but offers better control and support. You stand on an angled platform and push against shoulder pads, targeting your quads, glutes, and hamstrings. It’s great for building strength and muscle shape while reducing strain on your spine. Keep your feet shoulder-width apart and avoid letting your knees pass your toes. Slow, steady reps build both strength and confidence.
Glute Kickback Machine
The glute kickback machine isolates your glute muscles the powerhouse of your lower body. You push one leg backward against resistance, which activates your glutes, hamstrings, and even core. It’s perfect for building a rounder, stronger backside and improving hip stability. Avoid swinging your leg or using momentum. Keep movements slow and controlled for better muscle engagement.
Adductor and Abductor Machines
The adductor machine works the inner thighs, while the abductor machine targets the outer thighs and hips. Both are seated machines that use controlled leg movement against resistance. They help tone your thighs, stabilize your hips, and prevent imbalances that can lead to knee pain. Use light to moderate weight to start. Focus on full range of motion and controlled breathing these muscles fatigue quickly but respond well to consistent training.
Seated Leg Press (Horizontal Version)
The seated leg press is a variation of the standard 45-degree leg press. It’s more compact and easier on your lower back. You sit upright and push the platform forward, working your quads and glutes. It’s popular in physical therapy settings and beginner programs for its safety and comfort.
Glute Bridge or Hip Thrust Machine
The glute bridge machine focuses entirely on glute activation. You place your shoulders on a pad and thrust your hips upward using a padded bar for resistance. It’s one of the best machines for developing power in the posterior chain the glutes, hamstrings, and lower back. Use moderate weight and pause at the top for one to two seconds to maximize contraction.
Standing Leg Curl Machine
The standing leg curl machine lets you work one leg at a time, improving balance and control. You curl your heel toward your glutes against resistance, isolating your hamstrings. It’s perfect for correcting strength differences between legs.
Sled Push or Leg Sled
The sled push isn’t technically a machine, but many gyms have a weighted sled track. It’s a dynamic way to build power and endurance in your legs. You push a loaded sled across turf, which works the quads, calves, and glutes while raising your heart rate.
Understanding Leg Workout Machines Names
When you walk into a gym, the variety of leg machines can feel overwhelming each with unique angles, setups, and movement patterns. Understanding the names and purposes of these machines is essential to build a well-rounded leg workout that targets every major muscle group effectively. Below is a breakdown of the most common leg workout machines you’ll find in modern gyms, along with how each one contributes to strength, symmetry, and functional fitness.
Smith Machine
The Smith Machine is a versatile piece of equipment that supports a barbell on fixed vertical rails, allowing controlled up-and-down movement. It’s ideal for performing squats, lunges, and calf raises with added safety and stability. Beginners often use it to practice proper squat depth or form before moving to free weights. The Smith Machine engages the quadriceps, hamstrings, and glutes, depending on your stance, while minimizing balance challenges.
Benefit: Provides structure and safety for compound lower-body exercises, making it perfect for users learning correct squat mechanics or lifting heavier without a spotter.
Hack Squat Machine
The Hack Squat Machine simulates a squat with a back-supported, angled sled. Unlike traditional squats, your back remains supported throughout the movement, allowing you to focus purely on pressing through your legs. This setup isolates the quadriceps and glutes effectively while putting less strain on the lower back. Adjusting foot placement can shift emphasis between quads and hamstrings.
Benefit: Builds strong, defined quads while maintaining spinal support; excellent for those who want to push heavy without compromising posture.
Glute Kickback Machine
The Glute Kickback Machine targets the gluteus maximus the primary muscle responsible for hip extension and lower-body power. It involves pressing one leg back and upward in a controlled motion, simulating the natural movement of a hip extension. This machine is especially popular for shaping and toning the glutes, improving athletic strength, and balancing overall leg development.
Benefit: Isolates and strengthens glutes for improved lower-body aesthetics, sprint performance, and posture support.
Adductor/Abductor Machine
Often referred to as the “inner and outer thigh machines,” these two pieces of equipment train opposing muscle groups. The Adductor Machine focuses on the inner thigh muscles (adductors), while the Abductor Machine targets the outer thigh and hip stabilizers (abductors). Both are crucial for maintaining pelvic stability, knee alignment, and balanced muscle development.
Benefit: Improves hip strength, stability, and leg alignment vital for preventing injuries in athletes and gym-goers alike.
Leg Press Machine
While already discussed earlier, the Leg Press deserves mention here for its variety. Depending on the type horizontal, 45-degree, or vertical the machine helps simulate a squat movement safely. It primarily works the quads, hamstrings, and glutes, with foot placement determining which muscles take the lead.
Benefit: Allows heavy leg loading without balance demands, ideal for both muscle gain and joint-safe strength progression.
Seated Leg Curl Machine
This machine isolates the hamstrings the muscles on the back of your thighs through a bending knee motion. Sitting upright provides excellent support for controlled movement, helping prevent momentum-based cheating.
Benefit: Strengthens hamstrings, improves knee stability, and balances front-to-back leg muscle development.
Leg Extension Machine
The Leg Extension Machine is one of the most recognizable gym stations. It focuses purely on the quadriceps — the large muscles at the front of your thighs through a simple leg-straightening motion. Adjust the pad height and avoid locking your knees to protect your joints.
Benefit: Builds quad strength, enhances knee joint control, and adds definition to the front of the thighs.
Standing Calf Raise Machine
Standing calf raise machines allow you to work your gastrocnemius (the larger upper calf muscle) by lifting your heels against resistance. This exercise improves ankle stability and contributes to lower-leg aesthetics and power.
Benefit: Boosts calf strength, improves jump height, and enhances balance.
Seated Calf Raise Machine
This machine targets the soleus the deeper, endurance-based calf muscle through a seated position and bent knees. By pressing the balls of your feet against a platform, you build lasting calf endurance and symmetry.
Benefit: Develops well-rounded calf muscles that support long-term leg endurance and athletic movement.
Hip Thrust Machine
The Hip Thrust Machine is designed for one of the most effective glute-building exercises the hip thrust. It isolates the glute muscles through a full hip-extension motion, typically performed with your upper back supported and resistance applied across the hips.
Benefit: Builds powerful glutes, enhances posture, and strengthens the posterior chain for better sprinting and athletic power.
Hack Deadlift or Power Squat Machine
This hybrid machine allows you to perform squats or deadlifts in a guided motion. It’s ideal for targeting both the quads and hamstrings simultaneously while keeping your back supported. Adjustable footplates let you emphasize specific muscles quads for higher foot placement, glutes and hamstrings for lower stance.
Benefit: Provides controlled strength training with reduced risk of lower-back strain.
Glute Ham Developer (GHD)
The GHD machine is a staple in strength and conditioning programs. It focuses on glutes, hamstrings, and spinal erectors. Movements like GHD raises or back extensions improve hip extension strength and prevent hamstring imbalances.
Benefit: Increases posterior chain strength, reduces injury risk, and supports powerful athletic movement.
Best Exercise Equipment for Legs at Home
You don’t need a commercial gym to sculpt powerful legs modern home workout equipment has made leg training more accessible, space-efficient, and budget-friendly than ever. With the rise of home fitness, more people are investing in versatile tools that deliver results without bulky machines. According to a 2024 Statista survey, the global home fitness equipment market is expected to surpass $18 billion by 2026, fueled by compact designs and the convenience of at-home training. Below, we’ll explore the best leg workout equipment for your home gym setup, whether you’re aiming for strength, tone, or endurance.
Compact Leg Press for Home Gyms
A compact leg press machine is one of the most effective investments for serious lower-body training at home. Designed to mimic the traditional gym leg press but in a smaller footprint, these machines target your quads, glutes, hamstrings, and calves. Many models come with a folding or vertical design, making them ideal for tight spaces like apartments or garages.
Unlike bulky commercial models, compact versions often use resistance plates, bands, or hydraulic tension to generate load, which keeps them both lightweight and easy to store. Some even double as squat and calf raise machines, adding versatility.
Pro Tip: When using a compact leg press, focus on controlled movement and foot placement wider stances activate glutes, while narrow stances emphasize the quads.
Benefit: Delivers gym-quality leg strength training in a small, foldable design that fits home environments.
Resistance Bands and Mini Stepper
Resistance bands are arguably the most cost-effective and portable solution for building leg strength. They allow you to perform a wide range of movements from squats, lateral walks, glute kickbacks, and hamstring curls all without heavy equipment. Bands come in different resistance levels, making them perfect for beginners and advanced users alike.
Pair them with a mini stepper, and you’ve got a dynamic cardio-plus-strength combo. A mini stepper mimics stair climbing, helping tone the quads, hamstrings, calves, and glutes while improving cardiovascular endurance. It’s also low-impact, making it joint-friendly and ideal for daily use.
Pro Tip: Anchor resistance bands to sturdy furniture or use a door attachment to perform seated leg extensions or standing abductions. Combine these with 10–15 minutes on a mini stepper for an efficient at-home lower-body circuit.
Benefit: Offers a full range of motion exercises that improve tone, strength, and endurance with minimal equipment or space.
Adjustable Dumbbells and Benches
Adjustable dumbbells are a home gym staple compact, durable, and perfect for multi-angle leg exercises. Paired with a sturdy bench, they open up endless training possibilities for both unilateral and bilateral movements. Use them for Bulgarian split squats, step-ups, goblet squats, Romanian deadlifts, and hip thrusts all of which activate multiple lower-body muscles simultaneously.
Adjustable dumbbells save space compared to traditional sets and can quickly shift between light and heavy resistance, letting you progress as you get stronger. Adding a foldable bench enhances your range of motion for step-ups or glute bridges, allowing you to target stabilizing muscles effectively.
Pro Tip: Combine dumbbell front squats with bench-supported hip thrusts for a powerful lower-body routine that challenges both strength and endurance.
Benefit: Provides endless workout variety and progressive overload for all leg muscles from quads and hamstrings to glutes and calves.
Building an Effective Home Leg Routine
Even without commercial gym machines, you can build strong legs with the right combination of home equipment and structure. Here’s a sample at-home leg workout using the gear above:
Warm-Up (5 minutes)
- Bodyweight squats – 2 sets of 15 reps
- Glute bridges – 2 sets of 15 reps
- Banded lateral walks – 2 sets of 20 steps each direction
Strength Circuit (3 rounds)
- Compact leg press – 12 reps
- Bulgarian split squats (using dumbbells) – 10 reps per leg
- Mini stepper – 2 minutes continuous pace
- Glute kickbacks (resistance band) – 15 reps per leg
- Calf raises (on dumbbells) – 20 reps
Finisher:
Hold a 60-second wall sit and follow with 10 slow squats for maximum burn.
This combination not only strengthens your major leg muscles but also improves stability, balance, and endurance all from the comfort of home.
Choosing the Right Machine for Your Goal
Picking the right leg workout machine isn’t just about what’s available it’s about what you want to achieve. Whether you’re building muscle, toning, or recovering from an injury, each machine serves a distinct purpose. Choosing the right one keeps you on track and helps prevent overtraining or imbalance.
For Muscle Building
If your main goal is size and strength, you’ll want machines that allow heavier loads and full muscle activation. The leg press is your best friend here it mimics the squat movement without stressing your lower back or knees as much. You can adjust your foot placement to hit different muscles. A hack squat or Smith machine also fits this goal, letting you focus on controlled strength-building.
Pro Tip: Keep your reps between 6–10 with moderate to heavy resistance. Focus on pressing through your heels to recruit glutes and hamstrings effectively.
Other great muscle-building picks include:
- Leg extension machine: For isolating the quads and creating front-leg definition.
- Seated leg curl: For building the hamstrings and improving squat balance.
- Standing calf raise: For strong, aesthetic calves that complete your lower-body shape.
For Toning and Definition
If you’re chasing a leaner, tighter look, focus on machines that promote higher reps and controlled tempo. The adductor and abductor machines are perfect for shaping the inner and outer thighs — areas that respond well to endurance-style training. The glute kickback machine is another top choice, targeting your glutes and hamstrings without adding bulk. A leg press with lighter weights and higher reps (15–20 per set) also supports toning goals, helping define muscles while keeping joints protected.
Pro Tip: Try slow negatives (lowering the weight for 3 seconds) to increase muscle tension and calorie burn. These machines also help improve circulation, flexibility, and joint health while tightening the legs.
For Rehabilitation and Mobility
If you’re recovering from an injury or easing into training, gentle and supported movement is key. Start with the seated leg curl to rebuild hamstring strength without overextending the knee joint. The leg extension can help recondition the quads after a knee injury just keep the load light and the motion smooth. A recumbent leg press (with adjustable angles) is excellent for people with limited mobility or lower back issues, as it reduces joint strain. Resistance bands can also be used for controlled movement to restore flexibility and balance.
Pro Tip: Always begin with light resistance and focus on range of motion before increasing weight. If pain occurs, stop immediately and consult a physiotherapist.
How to Use Leg Machines Safely
Using leg workout machines the wrong way can do more harm than good. I’ve seen people load up plates, twist their knees, or rush through reps all mistakes that put stress on joints instead of muscles. The truth is, safety and form matter more than heavy weight. When you use machines correctly, you get better results and avoid setbacks.
Avoid Using Excessive Weight
This is the number one mistake I see at the gym. People assume heavier means better, but when it comes to leg machines, too much weight can strain the knees, hips, or lower back. Start with a weight that allows 10–12 smooth reps with full control. If your form breaks halfway, it’s too heavy.
Pro Tip: Focus on the muscle contraction, not on how much weight you can push. Strength comes from consistency, not ego lifting.
Check Your Seat and Pad Alignment
Every leg machine has adjustable parts and for a reason. If your seat or pad isn’t set to match your height, you risk twisting your knees or overstretching your joints. On a leg extension machine, for example, your knees should line up exactly with the pivot point of the lever arm. On a leg curl, your heels should rest just below the roller pad. Take 10 seconds before every set to adjust the machine to your body. This single habit can protect you from long-term joint wear and muscle imbalance.
Never Skip the Warm-Up
Jumping straight into heavy sets is like starting a car without oil things wear down fast. A proper warm-up preps your muscles and joints for the work ahead. Spend 5–7 minutes doing light cardio (like cycling or walking) followed by dynamic leg stretches such as leg swings, hip circles, and bodyweight squats. This increases blood flow, boosts flexibility, and lowers injury risk dramatically. Even professional athletes spend time warming up before every session it’s non-negotiable.
Control the Movement, Don’t Rush It
Fast reps might look intense, but they rob your muscles of tension. Whether you’re pressing, curling, or extending, keep a steady rhythm about 2 seconds on the lift, 2 seconds on the return. This helps your muscles work harder while reducing joint stress. Avoid locking out your knees at the end of a leg press or leg extension. That sudden snap of pressure can injure the tendons. Instead, stop just short of full extension and keep tension where it belongs — in the muscle.
Know When to Stop
Pain isn’t part of progress. If you feel sharp pain (especially in the knees or hips), stop immediately. Muscle fatigue is fine, but joint pain means something’s off either the load, the form, or the machine setup. Take breaks when needed, and never sacrifice posture just to complete a rep. You’ll build stronger legs faster by training smart, not recklessly.
Sample Leg Machine Workout Routine
If you’ve ever walked into the gym unsure where to start, this section clears it up. A structured leg machine routine helps you train every major muscle in your lower body without wasting time or energy. This plan builds both strength and balance and you can tailor it for beginners or advanced lifters.
Warm-Up (5–7 minutes)
Before diving into the machines, spend a few minutes waking up your legs. Use a stationary bike or treadmill at a light pace, then do dynamic stretches such as leg swings, walking lunges, and glute bridges. This primes your muscles for heavy work and lowers injury risk.
Full Leg Machine Routine
- Leg Press: 4 sets of 10 reps
This move is the foundation of any machine-based leg workout. It builds power in your quads, glutes, and hamstrings while protecting your back.
- Keep your feet shoulder-width apart.
- Press through your heels, not your toes.
- Lower the weight slowly and avoid locking your knees.
Rest: 60–90 seconds between sets.
Pro Tip: Adjust your foot position higher targets glutes and hamstrings, lower focuses on quads.
- Leg Curl: 3 sets of 12 reps
This machine isolates your hamstrings, helping balance the front and back of your legs.
- Set the pad just above your heels.
- Keep your hips down and core tight.
- Curl the weight smoothly without jerking.
Rest: 45–60 seconds between sets.
Pro Tip: Hold the squeeze for one second at the bottom to maximize muscle activation.
- Leg Extension: 3 sets of 15 reps
Ideal for building quad strength and definition.
- Align your knees with the pivot point of the machine.
- Lift in a controlled motion and stop before locking your knees.
- Lower slowly to keep tension throughout the movement.
Rest: 45 seconds between sets.
Pro Tip: Try one-legged extensions for better focus and symmetry.
- Seated Calf Raise: 4 sets of 20 reps
Your calves respond best to higher reps and time under tension.
- Keep your feet shoulder-width apart on the platform.
- Press through your big toes and lift as high as possible.
- Pause briefly at the top, then lower under control.
Rest: 30–45 seconds between sets.
Optional Add-Ons for Variety
If you’ve got extra time or energy, add these to make your leg day more complete:
- Adductor/Abductor Machine – 3 sets of 15 reps each: Great for inner and outer thighs.
- Glute Kickback Machine – 3 sets of 12 reps per leg: Perfect for targeting the glutes directly.
- Hack Squat Machine – 3 sets of 10 reps: Advanced lifters can use this for extra strength and power.
Pro Tip: Switch up the order occasionally. Doing hamstrings before quads (curls before press) helps improve stability and prevents early fatigue in compound moves.
Cool-Down (5 minutes)
Wrap up your workout with light stretching or a slow walk on the treadmill. Focus on your hamstrings, quads, and calves it’ll improve flexibility and reduce soreness the next day.
Final Thought
Building stronger, sculpted legs isn’t about how much weight you can push it’s about consistency, control, and smart training. The best results come when you combine the right machines, proper form, and steady progression over time. Even small improvements each week add up to serious strength and definition. Heavy lifting without focus is like driving fast without steering you’ll move, but not always in the right direction. Prioritize your technique, listen to your body, and adjust resistance gradually. That’s how you train smarter, not harder. Leg machines aren’t just tools for athletes; they’re for anyone who wants balance, confidence, and mobility that lasts. Whether you’re pressing, curling, or extending, every rep brings you one step closer to stronger, more capable legs.
FAQs
What’s the best leg machine for beginners?
For beginners, the leg press machine is the best place to start. It allows controlled movement with adjustable resistance, helping you learn to push through your legs without worrying about balance or barbell positioning. The leg press targets the quads, glutes, and hamstrings while supporting your back, making it ideal for new lifters building foundational strength.
Can I build big legs using only machines?
Yes, you can absolutely build size and strength in your legs using only machines. Compound machines like the leg press, hack squat, and Smith machine squat effectively load your muscles, while isolation machines such as the leg extension and leg curl refine definition. Focus on progressive overload gradually increasing weight or reps and controlled tempo to stimulate growth just like with free weights.
How many days a week should I train legs?
Most experts recommend training legs 2 to 3 times per week for balanced growth and recovery. You can split workouts into strength (heavier, lower reps) and hypertrophy (moderate weight, higher reps) days, or alternate between quad- and hamstring-focused sessions. Recovery is crucial give at least 48 hours between heavy leg days for optimal muscle repair.
Which machine helps tone thighs?
To tone and shape your thighs, the leg extension machine targets the quadriceps on the front of your thighs, while the seated or lying leg curl focuses on the hamstrings. For overall toning, pairing these with the adductor and abductor machines helps sculpt the inner and outer thighs. Performing moderate weight with higher reps (12–20 per set) enhances muscle endurance and definition.
Are leg machines good for seniors?
Yes leg machines are excellent for seniors because they provide guided motion, stability, and adjustable resistance, reducing injury risk. Machines like the seated leg press and leg curl improve lower body strength, balance, and joint function, supporting daily activities such as walking and climbing stairs. Seniors should start with lighter weights, focus on smooth movements, and always warm up before using any leg equipment.

Jeroen Dik is a name that often comes up when people talk about thoughtful leadership, grounded expertise, and real-world impact. Rather than being known for noise or hype, Jeroen Dik represents a quieter, experience-driven approach that values clarity, consistency, and learning by doing. In this article, we explore who Jeroen Dik is, what defines his professional mindset, and why his influence continues to resonate with people seeking substance over shortcuts.
Understanding Who Jeroen Dik Is
Jeroen Dik is widely recognized for a career shaped by hands-on experience rather than abstract theory. What makes Jeroen Dik interesting is how his work reflects practical decision-making rooted in observation, reflection, and long-term thinking. Instead of chasing trends, he focuses on fundamentals that remain relevant across industries and roles.
When people describe Jeroen Dik, they often highlight his ability to translate complex ideas into understandable actions. This clarity comes from years of engaging with real challenges, where outcomes matter more than appearances. Jeroen Dik builds trust by showing how ideas work in practice, not just on paper.
Another defining aspect of Jeroen Dik is balance. He blends analytical thinking with human awareness, recognizing that progress depends on systems and people working together. This approach makes Jeroen Dik relatable to professionals who value thoughtful growth, sustainable performance, and realistic expectations in everyday work.
The Professional Philosophy of Jeroen Dik
At the core of Jeroen Dik’s philosophy is the belief that meaningful progress starts with understanding context. Rather than applying one-size-fits-all solutions, Jeroen Dik emphasizes adapting strategies to real conditions. This mindset helps avoid wasted effort and creates outcomes that feel relevant and achievable.
Jeroen Dik also places strong value on responsibility. Decisions are not made in isolation, and he consistently considers how actions affect teams, processes, and long-term goals. This sense of accountability builds credibility and encourages others to think beyond short-term wins.
Another key principle in Jeroen Dik’s thinking is continuous learning. Experience is never treated as a finished product but as a foundation for refinement. By staying open to feedback and change, Jeroen Dik demonstrates how professional growth remains possible at every stage of a career.
Why Jeroen Dik’s Approach Feels Human
What sets Jeroen Dik apart is the human tone behind his work. He avoids rigid frameworks that ignore real-life complexity. Instead, Jeroen Dik acknowledges uncertainty and shows how thoughtful judgment often matters more than perfect information in daily decision-making.
This human-centered approach makes Jeroen Dik accessible. People can see themselves in his methods because they reflect common challenges like limited time, competing priorities, and imperfect data. His work reassures professionals that progress does not require perfection, only intention and effort.
Jeroen Dik also understands the emotional side of work. Motivation, trust, and confidence play major roles in outcomes, and he treats them as essential factors. By addressing these elements directly, Jeroen Dik creates space for healthier collaboration and more sustainable results.
Real-World Impact of Jeroen Dik’s Work
The influence of Jeroen Dik becomes clear when looking at practical outcomes rather than abstract recognition. His ideas often lead to improved workflows, clearer communication, and better alignment between goals and execution. These results matter because they directly affect daily professional life.
Jeroen Dik’s work also tends to age well. Because it is rooted in principles rather than trends, people continue to find value in his thinking long after initial implementation. This durability reflects a deep understanding of how organizations and individuals actually function.
Another important impact of Jeroen Dik is confidence-building. By breaking down complex challenges into manageable steps, he helps others feel capable of taking action. This empowerment is often what turns ideas into measurable progress across teams and projects.
Lessons Professionals Can Learn from Jeroen Dik
One clear lesson from Jeroen Dik is the importance of patience. Sustainable success rarely comes from rushing, and his work shows how steady effort compounds over time. This perspective helps professionals avoid burnout while still making consistent progress.
Jeroen Dik also demonstrates the value of listening. Before offering solutions, he prioritizes understanding perspectives, constraints, and goals. This habit leads to better decisions and stronger relationships, especially in environments where collaboration is essential.
Another takeaway from Jeroen Dik is adaptability. Conditions change, and rigid plans often fail. By staying flexible and responsive, he models how professionals can navigate uncertainty without losing direction or purpose in their work.
How Jeroen Dik Stays Relevant Over Time
Relevance for Jeroen Dik comes from staying grounded rather than chasing visibility. He focuses on solving real problems, which naturally keeps his work aligned with current needs. This practical relevance ensures his ideas remain useful across changing contexts.
Jeroen Dik also revisits his own assumptions. By reflecting on past outcomes, he refines his thinking instead of defending outdated views. This willingness to evolve strengthens his credibility and keeps his perspective fresh and applicable.
Another reason Jeroen Dik remains relevant is consistency. His values do not shift with every new trend, which builds trust over time. People know what to expect from Jeroen Dik, and that reliability is rare and highly valued in professional spaces.
The Broader Influence of Jeroen Dik
Beyond individual projects, Jeroen Dik influences how people think about work itself. He encourages a mindset that values clarity, respect, and long-term thinking over quick recognition. This broader influence shapes healthier professional cultures.
Jeroen Dik also impacts leadership styles. By modeling calm decision-making and thoughtful communication, he shows that authority does not require aggression or ego. This example resonates with leaders seeking more sustainable ways to guide teams.
Finally, Jeroen Dik’s influence extends through those he inspires. When people adopt his approach, they often pass it on, creating a ripple effect. This quiet spread of practical wisdom may be his most lasting contribution.
Conclusion
Jeroen Dik matters because his work reflects how progress actually happens in real life. Through practical thinking, human awareness, and steady learning, Jeroen Dik offers a model that feels achievable rather than idealized. His influence lies not in spectacle but in substance.
In a world often drawn to shortcuts, Jeroen Dik reminds professionals that clarity and consistency still work. By focusing on context, responsibility, and people, he shows how meaningful results grow over time. This message remains relevant across industries and roles.
Ultimately, Jeroen Dik continues to matter because his approach respects both the work and the people doing it. That balance creates trust, lasting impact, and a professional legacy rooted in experience rather than noise.
Real Questions People Ask About the Turkish Get Up
What is the Turkish Get Up?
The Turkish Get Up is a full-body exercise where you move from lying flat on your back to standing while holding a weight overhead, then return to the floor. It builds strength, balance, and control across every joint. Think of it as a slow-motion test of coordination. Each stage rolling, bridging, kneeling, standing forces your body to work as one solid unit. It’s not just about lifting a kettlebell; it’s about learning how your body moves under pressure.
Why should I learn the Turkish Get Up?
You should learn the Turkish Get Up because it trains strength, stability, and mobility at once. It teaches you to move safely while carrying weight overhead, improving shoulder and core control in real-life movements. The move forces your core to stabilize, your shoulders to lock in, and your hips to stay mobile. In short, it’s functional fitness at its finest. Many coaches use it as a “movement screen” if you can perform a smooth Get Up, your body’s mechanics are likely in good shape.
Is the Turkish Get Up safe for beginners?
Yes, the Turkish Get Up is safe for beginners if you start with no weight and focus on technique. Control each step instead of rushing, and add load only when your form feels stable. The key is patience. Most injuries happen when lifters grab a kettlebell too soon or skip learning each transition. Starting bodyweight-only allows you to master balance and shoulder position. Once you can flow through all phases smoothly, light resistance can be introduced.
What muscles does the Turkish Get Up work?
The Turkish Get Up works your core, shoulders, glutes, legs, and back. Every muscle group plays a part in moving you from the floor to standing while keeping the weight stable overhead. Your abs and obliques keep your torso from twisting. Your glutes and legs handle the lift and balance. Your shoulder and upper back muscles keep the kettlebell steady. Even your grip and forearms stay tight throughout. It’s a full-body effort, not an isolated move.
How often should I train the Turkish Get Up?
You should train the Turkish Get Up two to three times per week. It’s best treated as a skill, not just a workout move, so frequency matters more than intensity. Think of it like learning an instrument steady practice builds precision. Doing a few controlled reps each session helps your joints and muscles adapt to the flow. Some athletes use it in warm-ups; others make it a main lift. Either approach works if your form stays sharp.
Understanding the Turkish Get Up
Origin and Purpose of the Move
The Turkish Get Up originated from ancient wrestling and strength training in Turkey. It was used to test a fighter’s ability to rise from the ground with control, balance, and power while keeping a weapon or weight above their head. Old stories tell of soldiers and wrestlers who practiced the move daily.
The idea was simple if you could stand up while holding weight overhead without losing control, you were strong enough to fight, defend, or protect. It wasn’t just exercise; it was proof of functional strength. Today, it carries the same purpose teaching your body to work as one unit. Whether you lift a kettlebell or just your own body weight, the goal remains: stand tall from the ground with power and control.
The Philosophy Behind the Exercise
The Turkish Get Up teaches patience, precision, and awareness of every movement. It’s not about speed or strength alone it’s about control and balance through each transition. This move rewards focus. Each phase lying down, rolling, bridging, kneeling, standing requires full attention.
If one link is weak, the entire chain breaks. That’s why coaches often call it a “moving meditation.” When done right, it improves how you breathe, move, and stabilize. You learn to control pressure, tension, and release skills that carry over to every lift and sport. It’s not about lifting heavy fast; it’s about mastering control under load.
How It Builds Strength and Coordination
The Turkish Get Up builds strength by training your core, shoulders, and hips to move together. It develops coordination by forcing each side of the body to stabilize and balance through shifting positions. Most lifts move in straight lines up and down, push and pull. The Turkish Get Up moves diagonally, through rotation, flexion, and extension.
That’s why it hits smaller stabilizer muscles most people overlook. Each step in the Get Up from elbow to standing demands timing and stability. Your shoulder holds steady while your hips drive up. Your core resists twisting while your legs shift under control. This blend of strength and coordination creates the kind of balance athletes call “real-world power.”
Step-by-Step Turkish Get Up Form
Setting Up the Right Way
Start by lying flat on your back with one knee bent and one arm holding a kettlebell straight above your shoulder. Your free arm and leg stay extended on the floor at about a 45-degree angle. Keep your wrist straight and your eyes on the kettlebell. This setup builds your foundation. The arm holding the kettlebell should feel locked, not shaky.
Your shoulder blade stays pulled back, keeping the joint stable. The free hand helps with balance, like a kickstand. Before moving, take a deep breath and brace your core. Think of your abs as a tight belt holding your midsection firm. If you can hold this start position without wobbling, you’re ready for the first move.
The Initial Roll to Elbow
From the start position, press your planted foot into the floor and roll toward your free side until you come up on your elbow. Keep the kettlebell directly above your shoulder at all times. This step should feel controlled, not jerky. The power comes from your leg drive, not your arm. Imagine pushing the floor away with your foot while keeping your upper body tight. Common mistake: leading with your arm instead of your hip. Remember, you’re rolling your body as one piece, not yanking yourself up.
Transition to the Hand Position
From your elbow, press into your hand until your arm is straight. Your chest should open up naturally, with the kettlebell still vertical above you. Keep your shoulder packed down, not shrugged. The more space between your shoulder and ear, the safer your joint. Your supporting hand and opposite foot should form a solid base think of a tripod: hand, foot, and hip. Pause here and check your balance. If your shoulder feels unstable, reset and try again. This phase teaches shoulder control and body awareness.
Bridge and Sweep Phase
From the hand position, push your hips up into a bridge. Keep your weight evenly spread between your hand and foot. Then, sweep your straight leg under your body, placing the knee directly beneath your hip. This is where the move feels most athletic. You’re lifting your body off the ground and shifting balance midair. The bridge strengthens glutes and hamstrings, while the sweep challenges coordination. Keep the kettlebell still. If it starts to wobble, you’re rushing. Move slow until every motion feels smooth. It’s better to pause in control than to muscle through quickly.
Half-Kneeling to Standing Position
Once your knee is set under your hip, adjust your body into a half-kneeling position. From here, push through your front foot and stand tall, keeping your arm extended overhead. Your body should finish perfectly aligned arm straight, core tight, and feet under control. The kettlebell should feel like it’s floating above your head, not pulling your arm down. Avoid twisting or leaning. The goal is a clean, upright stand. If your balance feels off, reduce weight until you can stand smoothly. Proper form matters more than load here.
Reversing the Motion Safely
To finish, reverse every step you took to get up. Lunge back into a half-kneel, place your hand on the floor, sweep your leg through, and return to lying down all while keeping your arm locked out. Think of this as rewinding a movie. Each move should mirror the way up. Never drop the kettlebell suddenly; lower it with full control. The descent trains just as much strength as the ascent. Controlled reversal keeps your joints safe and builds endurance. Over time, this phase helps your body learn balance in reverse motion a true test of coordination.
Common Form Mistakes and Fixes
Rushing the Movement
Rushing through the Turkish Get Up often leads to poor balance and weak control. Each step needs steady pacing to keep your joints safe and your form solid. The Turkish Get Up isn’t a race. It’s a slow, skill-based lift that rewards patience. Moving too fast makes it hard to stay aligned and usually causes the kettlebell to wobble.
When that happens, your shoulders and lower back take the hit. To fix it, focus on tempo. Count a slow “one-one-thousand” at each stage. Pause when you reach the elbow, the hand, and the kneel. That brief stop builds awareness and teaches your muscles to hold tension under control.
Poor Shoulder Stability
Poor shoulder stability happens when the arm holding the kettlebell moves out of alignment. The shoulder must stay packed and strong through the entire motion to prevent strain. Your shoulder blade should stay pulled down toward your back pocket not shrugged toward your ear. If the arm wobbles, the weight shifts out of its safe path. That’s when injuries sneak in. A good fix is to practice with no weight while keeping your arm locked overhead. Focus on keeping the elbow straight and the wrist firm. Once your shoulder feels steady, add light weight. This builds awareness without overloading your joint.
Weak Core Engagement
Weak core engagement causes balance loss and poor transitions. The Turkish Get Up demands your core to stabilize every phase, especially during the roll and bridge. If your midsection isn’t braced, your body wobbles, and the weight pulls you off center. The fix is to breathe deep into your belly before each move. Tighten your abs like someone’s about to poke your stomach firm, not tense. Try adding planks or dead bug exercises between Get Up sets. They teach your body how to brace naturally. Once your core learns to stay firm, the movement feels smoother and safer.
Misaligned Knee or Foot
A misaligned knee or foot breaks your base of support, making you unstable. Each step of the Turkish Get Up depends on your lower body staying locked in proper alignment. When your front knee caves in or your foot turns too far out, balance disappears. That forces your back and shoulders to work harder than they should. To fix this, focus on keeping your front foot planted and your knee tracking directly over your toes. A mirror or video can help. Watch how your leg moves during the bridge and kneeling phases. Once your alignment looks straight, you’ll notice better control from the ground up.
Muscles Worked in the Turkish Get Up
The Turkish Get Up is one of the few full-body movements that train strength, balance, and mobility together. Every phase of the exercise demands muscle coordination from gripping the kettlebell to standing tall and reversing the motion with control. Here’s a detailed breakdown of how each major muscle group contributes to the movement.
Core Activation and Stability
The core is the foundation of the Turkish Get Up. It stabilizes your spine as you move through each phase, from lying down to standing up. Your rectus abdominis, obliques, and transverse abdominis all work together to keep your torso upright and your posture aligned. Unlike crunches, this isn’t about bending or flexing it’s about resisting motion and staying braced. That’s why athletes often say the Turkish Get Up “teaches the core to connect with the limbs.” The more stable your core, the smoother and safer the lift feels.
Shoulders and Upper Back Strength
Your shoulders, particularly the deltoids and rotator cuff muscles, stay under tension for nearly the entire duration of the Turkish Get Up. The exercise forces your shoulder joint to stabilize dynamically as your arm remains locked overhead while your body moves below it. This constant engagement helps strengthen the stabilizers and improves shoulder health over time. The upper back, including the trapezius and rhomboids, also play a major role in maintaining scapular positioning and preventing shoulder collapse during the lift.
Glutes, Hips, and Legs in Motion
When you drive through the bridge or transition into the half-kneeling position, your glutes and hips power the movement. The gluteus maximus, hamstrings, and hip flexors coordinate to lift the body off the ground and control the transitions. As you rise to standing, your quadriceps take over to extend the knees and complete the lift. This combination of hip extension and leg drive makes the Turkish Get Up a powerful tool for improving lower-body stability and athletic movement especially for runners, fighters, and strength athletes.
Grip and Forearm Endurance
The Turkish Get Up may not look like a grip workout, but it demands intense forearm and grip strength throughout. Holding a kettlebell overhead with a locked-out arm for the entire duration taxes your grip, wrist, and stabilizer muscles. The constant tension builds endurance in your flexor and extensor muscles, improving control and balance. Over time, this grip strength translates to better performance in lifts like presses, snatches, and even pull-ups.
Benefits of Doing Turkish Get Ups
The Turkish Get Up isn’t just a flashy kettlebell movement it’s one of the most functional, efficient, and transformative exercises in strength training. Each rep blends mobility, coordination, and controlled strength. Whether you’re an athlete, a lifter, or someone looking to move better in daily life, this movement delivers unique benefits that few exercises can match.
Strength and Balance Combined
One of the standout benefits of the Turkish Get Up is how it develops strength and balance simultaneously. As you rise from the floor to a full standing position while holding a kettlebell overhead, your body must constantly stabilize, shift weight, and coordinate every joint. This improves not just muscular strength but neuromuscular control the ability of your brain and muscles to communicate efficiently.
Unlike traditional lifts that rely on linear motion, the Turkish Get Up teaches your body how to stay strong through multiple planes of movement. Over time, this builds a type of stability that supports better posture, balance, and athletic performance.
Mobility and Joint Control
The Turkish Get Up forces your body to move through a full range of motion, making it a mobility powerhouse. Every phase demands precise control of your shoulders, hips, and thoracic spine. The overhead arm improves shoulder mobility, while the sweeping and bridging movements open up the hips. This dynamic control also trains the smaller stabilizing muscles that protect joints during complex movement. For people recovering from stiffness or those who sit for long periods, regular Turkish Get Up practice can significantly enhance flexibility and joint health.
Full-Body Conditioning Without Machines
You don’t need fancy gym equipment to build strength and endurance just a kettlebell and a bit of floor space. The Turkish Get Up engages nearly every muscle group, from your core and shoulders to your hips and legs, making it one of the best full-body conditioning tools available. Because it’s both a strength and cardio movement, it raises your heart rate, burns calories, and improves overall muscular endurance. Many strength coaches use it as a test of athletic readiness if you can perform a controlled Turkish Get Up with a heavy load, it shows you have excellent body awareness and physical balance.
Practical Strength for Real Life
Beyond aesthetics or gym performance, the Turkish Get Up develops functional strength the kind of power and control that transfers directly into daily activities. Think of lifting boxes, carrying groceries, getting off the floor, or stabilizing your body when you slip these all require the same coordinated strength you train in the Turkish Get Up. It’s an exercise that teaches your body how to move efficiently and safely through natural positions, reducing the risk of injury. That’s why it’s popular not just in fitness circles, but also in physical therapy, martial arts, and sports conditioning programs.
Training Tips for Progressing Safely
The Turkish Get Up might look simple, but it’s a technical movement that demands control, patience, and awareness. Rushing the process can lead to bad habits or even injury. Here’s how to train it safely while building a solid foundation for long-term progress.
Start with No Weight First
The best way to learn the Turkish Get Up is to start without weight. Practicing the movement pattern without a kettlebell helps you focus on coordination and body alignment. This “naked get up,” as many coaches call it, allows you to move freely without worrying about dropping a load. Place your hand where the kettlebell would be, extend your arm, and perform the full sequence. Doing this several times helps you memorize the positions and timing of each transition. Think of it as drawing a map before driving it makes the real thing smoother and safer.
Master Each Step Before Loading Up
The Turkish Get Up is built from several mini-movements rolling, posting, bridging, kneeling, and standing. It’s smart to master each part separately before combining them. Spend time on your roll-to-elbow and bridge phases until they feel natural. This builds muscle memory and teaches your body how to stay stable through shifting positions. Rushing to complete the full movement often causes poor form and shoulder instability. Remember: slow progress done right is better than fast progress done wrong.
Add Kettlebells Gradually
Once your form is consistent, begin with a light kettlebell something you can press overhead comfortably for 8–10 reps. Keep your eyes on the bell throughout the move to maintain alignment and safety. As your control improves, slowly increase the load in small increments. Avoid ego lifting; the Turkish Get Up rewards precision, not power. For context, advanced trainees often use 50–70% of their overhead press weight. Use data tracking note your reps, sets, and load each session to gauge progress. This steady approach prevents injury and builds confidence.
Use a Spotter or Mirror Feedback
Training solo? Set up in front of a mirror to check alignment during each phase. A mirror helps you see if your arm stays vertical, your knee tracks properly, and your torso remains stable. If you’re lifting heavier, have a spotter nearby for safety especially when learning to reverse the motion. They don’t need to touch the kettlebell, just be ready to guide or catch it if it drifts. This feedback loop helps correct small errors before they become habits.
Variations of the Turkish Get Up
The Turkish Get Up has more than one way to train your body. Whether you’re building mobility, power, or control, the right variation can help you reach your goals faster. Here’s how different versions of this exercise target specific aspects of strength and movement.
Bodyweight Get Up for Mobility
The bodyweight get up builds movement quality before strength. This variation skips the kettlebell and focuses on pure control. It’s great for beginners or for days when you’re warming up your joints and muscles. Without extra load, you can focus on improving hip mobility, shoulder positioning, and coordination. Try moving slowly and pausing at each step to feel your balance. This version also helps improve flexibility in the hips and thoracic spine, making it perfect for anyone recovering from stiffness or limited range of motion.
Kettlebell Get Up for Strength
The kettlebell get up is the classic version that tests stability, endurance, and total-body strength. Holding a kettlebell overhead forces your muscles to coordinate under tension, building strength through every angle. The uneven weight distribution of the kettlebell makes it ideal for training grip and shoulder stability. Start with light weight until you can control the bell at every stage from rolling up to standing tall. Over time, you’ll notice improved posture and shoulder health, as well as greater strength in your core and hips.
Dumbbell or Sandbag Variations
If kettlebells aren’t available, dumbbells and sandbags work just as well. A dumbbell get up challenges you to control a more balanced load, which helps fine-tune wrist stability and grip endurance. Meanwhile, a sandbag get up offers a more dynamic challenge. The shifting weight inside the bag forces your core and stabilizers to react constantly, mimicking real-life strength demands. Both tools are great for adding variety and preventing training plateaus.
Slow-Tempo Get Ups for Control
If you want precision, go slow. Slow-tempo get ups focus on time under tension controlling every movement for 3–5 seconds per phase. This version strengthens stabilizer muscles and refines technique. You’ll feel your body working harder to balance and control the kettlebell, especially during transitions like the bridge and sweep. This method also improves mental focus, teaching patience and body awareness. Think of it as strength training and mindfulness combined.
How to Add Turkish Get Ups to Your Training
The Turkish Get Up fits easily into almost any workout plan whether you’re warming up, training for strength, or improving balance. The key is knowing when and how to use it to get the most benefit without overtraining. Here’s how to make it work in your routine.
Warm-Up or Strength Segment?
The Turkish Get Up can be both a warm-up and a main lift it depends on your goal. If you’re using light weight or just your body, it’s an excellent warm-up. It activates your shoulders, core, and hips while improving joint mobility before heavier training. Using heavier loads turns it into a strength-building exercise that challenges your stability and endurance. For warm-ups, 2–3 reps per side at a slow pace works best. For strength sessions, aim for 3–5 sets of 2–3 reps per side with controlled breathing and full focus.
Sample Turkish Get Up Workout Plan
If you’re unsure where to start, here’s a simple plan to include Turkish Get Ups in your weekly training:
Beginner Routine (2–3 times per week):
- 3 sets of 3 reps per side (bodyweight or light kettlebell)
- Rest 60–90 seconds between sets
Intermediate Routine (2 times per week):
- 4 sets of 2 reps per side (moderate kettlebell)
- Pair with movements like goblet squats or push-ups
Advanced Routine (1–2 times per week):
- 5 sets of 1–2 reps per side (heavier kettlebell)
- Superset with swings or lunges for a full-body challenge
Keep a training log to track progress over time note your load, reps, and any movement limitations. This helps you see steady improvement and avoid plateauing.
Combining Get Ups with Other Lifts
The Turkish Get Up pairs well with other compound lifts like deadlifts, presses, and squats. Since it engages stabilizers and promotes alignment, it’s great before or after these movements. For example, performing get ups before a heavy pressing day can warm the shoulders and improve stability. On lower-body days, pairing them with lunges or kettlebell swings builds total-body control. You can also add them as a finisher for endurance one rep per side every minute for 10 minutes is a solid challenge. Just remember to prioritize quality over quantity. When fatigue sets in, the Turkish Get Up can easily turn sloppy, so always maintain form first.
Safety and Recovery Tips
The Turkish Get Up is powerful, but it can also be demanding if your body isn’t prepared. Smart training means paying attention to safety and recovery both before and after your workouts. Here’s how to keep your shoulders, core, and joints healthy while getting stronger with each session.
Shoulder Mobility Drills Before Training
Before doing Turkish Get Ups, loosen your shoulders and upper back. Tight shoulders can throw off your alignment and increase the risk of strain. Start with mobility drills like arm circles, shoulder dislocates using a band, and wall slides. Add a few scapular push-ups to activate your shoulder blades. These simple moves warm up your rotator cuff and increase the range of motion, making the kettlebell feel lighter and more stable overhead. You can also include thoracic spine rotations and cat-cow stretches to loosen the upper body further. Think of these as “oil” for your joints smoother motion equals safer lifting.
Breathing and Tempo Control
Your breath drives your stability. Controlled breathing keeps your core tight and movements steady. Inhale before each transition to brace your body, then exhale as you move through the phase. This helps keep pressure through your midsection and prevents collapsing or wobbling. A slow tempo matters just as much as breathing. Rushing the Turkish Get Up increases mistakes and tension in the wrong muscles. A pace of three to five seconds per phase keeps your form tight and builds awareness. For beginners, count out loud “one, two, three” to stay in rhythm. Over time, breathing and tempo will feel automatic, and your control will improve dramatically.
How to Avoid Overuse or Strain
The Turkish Get Up can be tough on the shoulders and hips if you overdo it. Stick to two or three sessions per week and allow at least a day of rest between heavy workouts. This gives your muscles time to recover and adapt. If you feel shoulder fatigue or tightness, skip the kettlebell and do bodyweight get ups until it feels better. Focus on form cues rather than reps if your arm starts shaking or your balance slips, that’s a signal to stop. Post-training, use light stretching for the hips and shoulders and apply a foam roller along the upper back and glutes. Recovery isn’t a luxury; it’s part of the process that helps you come back stronger.
Key Takeaways
The Turkish Get Up isn’t just another exercise it’s a skill that rewards patience, control, and consistency. Whether you’re training for strength, mobility, or coordination, mastering this movement builds the kind of stability and awareness few other lifts can match.
Here’s what to keep in mind:
- Form comes first: Every phase of the Turkish Get Up matters. Slow down, stay tight, and move with purpose. A single rep done right beats ten done fast.
- Train smart and steady: Two to three sessions a week is plenty for progress. Mix in variations like bodyweight or slow-tempo get ups to keep your body adapting.
- Balance strength with mobility: Your shoulders, hips, and core all play a role. Warm them up before training and recover after to prevent overuse.
- Consistency beats intensity: The Turkish Get Up rewards regular practice. Over time, you’ll feel stronger, more balanced, and more in control of your body.
FAQs
How heavy should my kettlebell be?
Start with a kettlebell you can press overhead for 8–10 reps comfortably. That usually means 8–12 kg (18–26 lbs) for most beginners. If you struggle to keep your arm straight or stable, go lighter. The goal isn’t to lift heavy right away it’s to move smoothly and stay balanced. Once your form feels locked in, increase weight gradually by 2–4 kg.
Can Turkish Get Ups replace ab workouts?
Yes, they can to a large extent. The Turkish Get Up works your core through stability, not crunching. Every transition demands control from your abs, obliques, and deep stabilizers. While it’s not a “six-pack” isolation move, it strengthens your midsection in a functional way. That said, pairing it with planks or anti-rotation work can round out your core routine for even better results.
Should I do them daily?
No, daily practice isn’t necessary or smart. The Turkish Get Up taxes your shoulders, hips, and nervous system. Doing it too often can lead to fatigue or joint strain. Two to three times a week is ideal for most lifters. Use off days for mobility drills, stretching, or light cardio to stay active without overloading your body.
What’s a good rep range for beginners?
Start with 2–3 reps per side for 3–4 sets. Quality matters far more than quantity. Each rep should feel controlled from start to finish. Take 30–60 seconds between reps to reset your focus and breathing. As you get stronger, you can progress to 4–5 sets or increase the load slightly. Avoid marathon-style sessions short, focused practice works best for learning proper technique.

Real Questions Runners Ask
How many days a week should I run to improve speed?
The ideal range for improving speed is 3 to 5 days a week. This balance allows your body to adapt, recover, and build strength without burning out. Training less than 3 days might limit progress, while going beyond 5 days raises the risk of fatigue or injury.
Think of your legs like a car engine run it too little, it stays sluggish; run it too much, it overheats. The sweet spot is keeping it running often enough to stay warm but giving it time to cool down. A structured plan with interval runs, tempo sessions, and easy recovery days builds both endurance and pace.
Is running every day good for getting faster?
Running daily isn’t the fastest path to speed it’s the fastest path to burnout. Your muscles need rest to rebuild stronger. Without recovery, your speed plateaus, and injury risk climbs fast. A common mistake is thinking “more miles equals more speed.”
In reality, rest days are part of training. They’re like pit stops in a race without them, even the best car won’t finish. Instead of running seven days, add one or two cross-training sessions like cycling or swimming to stay active while resting your legs.
Can beginners train for speed safely?
Yes, beginners can train for speed safely with proper pacing and rest. The key is gradual progression small steps, not giant leaps. Starting too fast or too frequent is what causes setbacks. For new runners, 3 days per week is enough. One speed-focused day, one easy run, and one longer steady run build a solid foundation. Think of it like stacking bricks skip one layer and the wall collapses. With consistency, even beginners can see real speed gains within two months.
What if I don’t have time for long runs?
You can still get faster with short, high-quality sessions. Time isn’t the issue effort is. A 25-minute interval run can deliver more progress than a 60-minute jog if done right. If your schedule’s tight, focus on intensity. Short hill sprints, tempo runs, or Fartlek workouts train your body to move efficiently in less time. The key is consistency three focused runs per week beat one long, lazy jog.
The Straight Answer Finding Your Ideal Running Frequency
Why 3 to 5 days is the sweet spot
Running 3 to 5 days a week gives the best results for speed improvement. This range lets your body build endurance, increase pace, and recover between sessions. Anything less, and progress slows; anything more, and you risk fatigue or injury.
Think of it like tuning a guitar. Tighten the strings too much and they snap, leave them too loose and they sound dull. Three to five days keep your body “in tune.” You get enough mileage for stamina, enough intensity for speed, and enough rest for growth.
For most runners, the schedule looks like this:
- 3 days: Ideal for beginners or those with tight schedules.
- 4 days: Balanced mix of speed work and easy runs.
- 5 days: Best for experienced runners with solid recovery habits.
How rest days help you gain speed, not lose it
Rest days are when your body gets faster not slower. Muscles repair, glycogen refills, and micro-tears heal stronger. Skip rest, and your progress stalls. Think of rest as a silent training partner. It doesn’t show up on your pace tracker, but it does all the behind-the-scenes work.
Without it, your legs feel heavier, your strides shorten, and your motivation drops. One or two rest days per week give your muscles time to adapt to stress, improving both endurance and speed. If sitting still feels tough, try active recovery light walking, yoga, or cycling. These keep blood flowing and help reduce soreness without adding strain.
Balancing quality over quantity in training
Speed comes from smart sessions, not endless miles. Many runners chase mileage instead of focusing on the quality of each run. But more miles don’t always equal better performance. Imagine baking bread. Too much kneading toughens the dough; too little leaves it flat. Running works the same way the right mix of effort and rest creates stronger, faster muscles. Focus on three key runs each week:
- Speed session: Intervals or sprints to build power.
- Tempo run: Steady pace to improve stamina.
- Long run: Builds endurance and mental strength.
Add easy runs or cross-training if time allows, but never at the cost of recovery. Quality workouts challenge your system, while quantity alone just drains it.
The Science Behind Running Faster
What your muscles need to adapt
Muscles need stress, recovery, and fuel to adapt and get faster. Each run breaks down muscle fibers slightly, and during rest, they rebuild stronger. Without this cycle, progress stalls. Think of your muscles like clay. They only shape when pressed and rested between molds. Run hard every day, and the clay cracks. Run just enough and let it rest, and it becomes solid and resilient.
When you run, small tears form in your muscle fibers, especially in your quads, calves, and hamstrings. During recovery, your body repairs these micro-tears with stronger fibers, improving endurance and speed. Add proper nutrition carbs for energy and protein for rebuilding and you’ll see faster progress.
How aerobic vs anaerobic training affects speed
Speed depends on both your aerobic and anaerobic systems working together. The aerobic system powers long efforts, while the anaerobic system kicks in for short, intense bursts. Imagine two engines in one car one runs long and steady, the other gives quick acceleration. You need both to run faster. Aerobic training builds endurance and helps your body use oxygen efficiently.
Anaerobic training like sprints or hill repeats improves how well your body performs without oxygen. To get faster, combine both. Easy, steady runs train your aerobic base. Short intervals or tempo runs train your anaerobic system to tolerate lactic acid and delay fatigue. Over time, you’ll run longer and faster before your legs start to feel heavy.
Why consistency matters more than intensity
Consistency is the real secret to getting faster not how hard you run. Runners who stick to regular training see better results than those who go all-out and burn out. Think of progress like watering a plant. Pour too much at once, it drowns; skip a few days, it wilts. But steady watering keeps it growing strong.
The same applies to running short, frequent runs build more speed than random bursts of effort. When your body trains regularly, your cardiovascular system strengthens, your stride becomes efficient, and your muscles adapt to repetitive stress. Over time, this turns effort into ease what felt hard last month becomes your warm-up pace today.
The Perfect Weekly Running Plan for Speed
The 3-Day Plan: For tight schedules
Running three days a week can still make you faster if each run has purpose. You’ll focus on quality workouts that target speed, endurance, and recovery. This plan fits busy people who can’t run daily but still want results. Think of it as a focused approach every run counts. Your week could look like this:
- Day 1: Speed workout: Short intervals or hill sprints (20–30 minutes) to build power.
- Day 2: Easy run: Light pace for 30–40 minutes to boost endurance.
- Day 3: Long run: Gradually increase distance weekly to strengthen your aerobic base.
Three well-planned runs a week can improve your pace within a month if you stay consistent.
The 4-Day Plan: For steady progress
A 4-day running plan strikes a perfect balance between rest and progress. It gives enough volume to improve endurance while allowing recovery to prevent burnout.
Here’s how it might look:
- Day 1: Speed session — intervals or tempo work.
- Day 2: Easy recovery run.
- Day 3: Rest or cross-train (cycling, yoga).
- Day 4: Long run at a steady pace.
This schedule fits intermediate runners aiming to increase pace safely. You get more mileage than a 3-day plan without overwhelming your body. With time, this routine improves aerobic efficiency and leg strength — both key to faster running.
The 5-Day Plan: For advanced runners
Five days of running per week is best for experienced runners chasing personal records. It offers enough volume to sharpen both speed and endurance while leaving room for recovery.
This plan could look like this:
- Day 1: Speed intervals or track work.
- Day 2: Easy run for active recovery.
- Day 3: Tempo run steady pace near race effort.
- Day 4: Rest or light cross-training.
- Day 5: Long endurance run.
The fifth day adds mileage, building aerobic depth while reinforcing good running mechanics. This approach works well for athletes preparing for 10K or half-marathon races where consistent weekly training is key.
How to schedule rest days and recovery runs
Rest and recovery runs are what keep your speed gains alive. Without them, you’ll overtrain and hit a wall. Rest days let muscles rebuild, and recovery runs flush out soreness while keeping your legs loose. A good rule of thumb after every hard session, include a rest or light day. If you’re running 5 days a week, spread rest days to break up intensity.
For example:
- After interval training → rest or cross-train.
- After long runs → easy jog or complete rest.
- Before race day → recovery run or full rest.
Think of recovery as your reset button it restores strength and focus so you can attack the next workout at full energy.
Mistakes That Slow Down Your Progress
When it comes to running faster, many athletes unknowingly sabotage their own progress through common training errors. Whether it’s overtraining, neglecting recovery, or skipping the little things like warm-ups, these mistakes can hold you back even when you’re putting in the miles. Below are the most frequent pitfalls that slow runners down and how to fix them for good.
Running Hard Every Day
One of the most damaging habits runners develop is pushing too hard every single run. While it’s tempting to think that faster running equals faster results, your body doesn’t improve during the workout it improves during recovery. Running at high intensity every day elevates cortisol levels, depletes glycogen stores, and leads to fatigue that compounds over time.
Elite runners follow the 80/20 rule: 80% of runs should be easy or conversational, while only 20% should be challenging (tempo runs, intervals, hill sprints). This balance ensures your aerobic base grows while still allowing for quality speed work. Without recovery runs and slower sessions, your legs never rebuild the power fibers needed for faster times.
Pro tip: Schedule your speed workouts two to three times a week, separated by easy runs or rest days. This approach optimizes both performance and adaptation.
Ignoring Recovery or Sleep
Sleep is the ultimate performance enhancer yet it’s the first thing runners sacrifice. Recovery doesn’t only happen when you take a day off; it happens when your body repairs microscopic muscle tears and replenishes energy during deep sleep. Skimping on rest slows this process, leading to sluggish runs, plateaued progress, and increased injury risk.
Studies show that athletes who get fewer than 7 hours of sleep a night have over 1.7x higher injury rates compared to those sleeping 8+ hours. Likewise, taking one or two full rest days per week can enhance speed development by allowing your nervous system to reset.
Pro tip: Treat recovery as part of your training plan. Use active recovery methods foam rolling, stretching, yoga, or short walks on off days to boost blood flow and mobility.
Skipping Warm-Ups and Cool-Downs
Running without warming up is like driving a car without oil it might move, but not for long. A proper warm-up raises core temperature, activates key muscles, and primes your cardiovascular system for faster paces. Skipping it increases injury risk and delays your ability to hit target speeds early in your run.
A solid warm-up should include 5–10 minutes of light jogging followed by dynamic movements such as leg swings, high knees, or butt kicks. Similarly, cooling down afterward helps flush lactic acid and gradually lower your heart rate, reducing post-run soreness.
Pro tip: Think of warm-ups as your “speed insurance.” Just 10 minutes can make your next 30 minutes of running far more effective.
Not Tracking Pace or Distance
You can’t improve what you don’t measure. Without tracking your pace, mileage, and effort, it’s nearly impossible to identify patterns or areas that need work. Many runners overestimate their weekly mileage or run at inconsistent speeds, leading to stagnation.
Using a GPS watch or running app like Strava, Nike Run Club, or Garmin Connect gives you accurate feedback and allows you to set measurable goals. Tracking pace progression, heart rate zones, and rest days provides insights into when you’re improving and when you’re overreaching. For speed training, monitor your “split consistency” how evenly you hold pace across intervals. The more consistent your splits, the better your pacing discipline and overall speed endurance.
| Mistake | Common Symptom | Impact on Performance |
| Running hard daily | Chronic fatigue | Decreased speed and motivation |
| Poor sleep (<7 hrs) | Slower reaction times | 1.7x higher injury risk |
| Skipping recovery | Persistent soreness | Reduced muscle repair |
| No warm-up/cool-down | Tight muscles | 25% higher strain risk |
| No pace tracking | Inconsistent training | Plateaued progress |
How to Measure If You’re Actually Getting Faster
Running faster isn’t just about how you feel during a workout it’s about measurable progress. Many runners mistakenly assume that effort equals improvement, but true speed gains show up in the data: pace, heart rate, and recovery trends. Whether you’re training for a 5K or simply want to see if your fitness is improving, learning to track performance the right way ensures your training stays on course.
Tracking with GPS Watches or Apps
Modern running technology makes progress tracking effortless. GPS watches like Garmin, Coros, or Apple Watch, and running apps like Strava, Nike Run Club, or MapMyRun, can log your pace, distance, elevation, cadence, and even heart rate all essential for analyzing improvements over time.
To accurately assess if you’re getting faster, focus on average pace per mile (or kilometer) and consistency across runs. If your easy runs start feeling easier at the same pace or you can maintain a faster pace at the same perceived effort that’s a clear indicator of progress.
Pro tip: Review your pace trends every 2–3 weeks. Many apps visualize progress through graphs, helping you spot steady improvement or identify when you’ve plateaued and need to tweak your plan.
Timing Short Intervals Weekly
One of the best ways to measure running speed is by repeating short, controlled intervals each week. For example, running 4×400 meters or 6×200 meters at a set effort allows you to directly compare times and track improvement. If your average split times are dropping or you’re maintaining speed with less fatigue, you’re getting faster. Short intervals are especially useful because they minimize external factors like weather and fatigue that affect long runs. To make your tracking consistent, run the same route or treadmill settings each time.
Pro tip: Keep a simple log of your interval times, heart rate, and perceived effort (1–10 scale). Over a few weeks, you’ll clearly see performance trends emerge.
Watching for Heart Rate Improvement
Heart rate is one of the most reliable indicators of improved running efficiency. When you train consistently, your cardiovascular system adapts meaning your heart pumps more efficiently, and you can sustain faster paces with less effort.
If your average heart rate for easy runs drops while maintaining the same pace, that’s a positive sign. Similarly, if your recovery heart rate (how quickly it drops after a hard interval) improves, it shows better aerobic conditioning.
For example: A runner who initially holds an 8:30 min/mile pace at 155 bpm but later runs the same pace at 145 bpm is becoming faster and more efficient.
Pro tip: Use a heart rate monitor (built-in or chest strap) and review weekly averages. Pairing this data with pace and perceived effort gives a full picture of your fitness gains.
Adjusting Your Plan Based on Results
Tracking is only valuable if you use the information to adjust your training plan. If your progress plateaus for instance, your pace or heart rate trends haven’t improved in 3–4 weeks it might mean you’re overtraining, under-recovering, or not including enough speed work.
To break through a plateau, consider:
- Adding short interval sessions once a week.
- Increasing easy run mileage slightly to improve aerobic capacity.
- Incorporating a deload week (lighter training) to reset your body.
- Reassessing sleep and nutrition, which directly affect performance.
By continuously refining your training frequency and effort based on these metrics, you ensure sustainable progress without burnout.
Pro tip: Every 8–10 weeks, run a short time trial (like a 3K or 5K) under similar conditions. Compare your pace and heart rate data with past results to confirm real improvement.
| Week | Avg. Pace (min/mile) | Avg. Heart Rate (bpm) | Recovery Time (min) |
| 1 | 9:15 | 157 | 3:20 |
| 2 | 9:00 | 155 | 3:05 |
| 4 | 8:45 | 151 | 2:50 |
| 6 | 8:35 | 148 | 2:40 |
| 8 | 8:20 | 144 | 2:25 |
Nutrition and Sleep: The Hidden Speed Boosters
Most runners focus on mileage, pace, and workout plans, but often overlook two silent game-changers: nutrition and sleep. You can’t out-train a bad diet or poor recovery. What you eat and how well you rest determine how fast you recover, how strong your muscles perform, and ultimately how fast you run.
Why Carbs and Protein Timing Matter
The best time to eat carbs and protein is before and after runs. Carbs fuel your muscles, while protein repairs them after training. The right balance ensures your body has enough energy for speed sessions and strength to rebuild afterward. Before your run, aim for a small carb-rich meal 60–90 minutes prior think oatmeal, bananas, or toast with honey. This gives your muscles the glycogen they need to perform at top speed. After your run, refuel with a 3:1 ratio of carbs to protein.
For example: A smoothie with Greek yogurt and fruit, or chicken with rice. When timed correctly, your body recovers faster, glycogen stores refill quicker, and soreness decreases all essential for speed training.
Analogy: Think of your body like a smartphone. If you don’t charge it before and after heavy use, it runs out of power fast. The same goes for your muscles carbs charge, protein repairs.
Hydration and Electrolytes for Recovery
Hydration isn’t just about drinking water it’s about maintaining electrolyte balance. When you sweat, your body loses sodium, potassium, and magnesium minerals that help your muscles contract efficiently. Without them, you’ll fatigue faster and risk cramps.
The right approach:
- Drink 16–20 ounces of water two hours before your run.
- Sip water during long runs or speed work.
- Afterward, replace fluids with an electrolyte drink like Nuun, Skratch, or coconut water.
If your sweat leaves white salt marks on your clothes, you’re likely losing more sodium and need to replenish more aggressively.
Example: A 2022 study from the European Journal of Sport Science found that runners who replaced lost electrolytes after workouts recovered 23% faster and maintained better power output during sprint sessions.
Hydration isn’t a “nice-to-have.” It’s a direct performance enhancer. Think of your muscles like car engines even a small fluid deficit can make them run rough.
How Sleep Directly Affects Your Running Speed
Sleep is the single most underrated performance tool in running. During deep sleep, your body repairs micro-tears in muscles, releases growth hormones, and strengthens your immune system. Without it, your body can’t adapt to training stress, no matter how disciplined your workouts are. Runners who consistently sleep 7–9 hours per night have better reaction times, improved endurance, and faster recovery.
A study published in the Sleep Journal showed that athletes who increased their sleep from 6 to 8 hours improved sprint times by 5% and reduced fatigue by 20%. If you’re cutting sleep to squeeze in early morning runs, you’re actually slowing your progress. It’s like trying to fill a bucket with holes without enough rest, the effort leaks away.
Tips for better sleep:
- Keep a consistent bedtime and wake-up time.
- Avoid heavy meals or screens an hour before bed.
- Keep your room dark and cool — ideal sleep temp is 18–20°C (65–68°F).
Your body treats sleep like training. The better you rest, the stronger and faster you become.
| Sleep Hours | Performance Effect | Recovery Impact |
| 5–6 hours | Slower reaction time, fatigue | Poor recovery |
| 7–8 hours | Improved muscle repair | Steady progress |
| 8–9 hours | Optimal hormone balance | Faster speed gains |
When to Increase or Decrease Your Running Days
The trick to running faster isn’t just running more it’s running smart. Knowing when to add mileage or take a break makes the difference between steady progress and burnout. Your body always sends signals. The key is learning to listen before it’s too late.
Signs You’re Ready to Add More Runs
You’re ready to increase your running days when your body recovers well, your runs feel easier, and your motivation stays high. If you can finish a workout without lingering soreness, maintain your pace comfortably, and wake up feeling energetic instead of drained, your body’s likely ready for a little more. Most runners hit this point after 4–6 weeks of consistent training.
Here’s what to watch for before adding another run:
- Steady pacing: You’re holding your speed without extra effort.
- Quick recovery: You bounce back after hard workouts within a day or two.
- No injuries: Joints, knees, and shins feel solid after multiple sessions.
- Mental drive: You want to run, not force yourself to.
When these boxes are checked, try adding one extra easy run per week something short, relaxed, and conversational. This adds aerobic volume without extra stress.
Metaphor: Think of your body like a savings account. Don’t invest more unless your balance (recovery) can handle the risk.
Signs You’re Overtraining or Need Rest
You need to cut back when fatigue, irritability, and slower pace start showing up even though you’re training the same. These are classic signs of overtraining your body’s way of saying “enough.”
Overtraining doesn’t always mean injuries. Sometimes it looks like:
- You’re sleeping 8 hours but still exhausted.
- Runs feel harder than usual.
- Heart rate is higher for the same pace.
- You lose motivation or feel moody.
- You get sick more often or can’t shake soreness.
Ignoring these signs leads to injuries like shin splints, tendonitis, or burnout. A short rest period even 3–5 days of complete rest or light cross-training can reset your system.
Example: According to the British Journal of Sports Medicine, runners who ignored early overtraining symptoms increased their injury risk by 61% compared to those who took recovery breaks early.
Pro tip:Use a simple check-in rule if your resting heart rate is 10 bpm higher than usual for two consecutive mornings, skip that day’s run and focus on recovery.
Seasonal or Lifestyle Adjustments to Training
Life doesn’t always fit neatly around your running plan. Seasons change, work gets hectic, or sleep takes a hit and your training should adapt, not break you.
Adjust for the seasons:
- In hot weather, reduce intensity and run early or late to avoid heat stress.
- In winter, swap outdoor runs for treadmill intervals or strength work.
- During race season, shift focus from volume to sharpening your speed.
Adjust for your lifestyle:
- If work hours increase, cut one run but make the others count.
- After a stressful week, trade a tempo run for an easy jog or yoga.
- When you’re on vacation, focus on maintaining fitness rather than chasing PRs.
Your running plan should move with your life, not against it. Think flexibility, not perfection. The best runners are the ones who adapt without guilt.
Example: Elite runners often train 6 days a week, but they also take recovery blocks and adjust around life events — proving consistency over time matters more than rigid schedules.
Final Thought
Running faster isn’t about punishing your body it’s about training smart, staying patient, and respecting recovery. Every runner’s pace and path are different, but progress follows the same formula: consistency, rest, and purpose-driven effort.
Quick Summary of Key Takeaways
To get faster, you don’t need to run every day you need to run right.
- 3 to 5 days per week is the sweet spot for most runners.
- Rest days help your muscles rebuild and strengthen.
- Nutrition and sleep fuel your speed as much as your workouts.
- Tracking progress through pace, heart rate, and intervals keeps you on target.
The key isn’t doing more miles it’s making every mile count. A well-balanced schedule, fueled body, and rested mind outperform endless mileage every time.
Example: Even elite runners structure their weeks around effort and recovery cycles proof that more isn’t always better.
Encouragement to Personalize Frequency and Stay Consistent
Running isn’t one-size-fits-all. Some runners thrive on 3 focused runs a week, while others handle 5 without issues. What matters most is consistency over perfection. Think of your training like fine-tuning a radio. If the signal (your body’s feedback) gets fuzzy fatigue, soreness, or burnout you adjust the dial, not throw out the whole system. Your perfect plan is the one that fits your lifestyle, keeps you healthy, and makes you look forward to lacing up your shoes. Stay consistent, stay curious, and tweak your plan as your body evolves.
Pro tip: Record your weekly runs and recovery days in a simple journal or app. Small notes like how a session felt or how you slept reveal patterns that help you refine your rhythm over time.
Realistic Reminder That Rest Is Part of the Speed Process
Here’s the truth: you get faster while resting, not while running. Training breaks your muscles down; rest builds them back stronger. Without recovery, all the effort you pour into workouts goes to waste. Rest isn’t laziness it’s smart strategy. Skipping rest is like skipping the “save” button after hours of work. Your progress simply won’t stick. So, instead of fearing rest days, welcome them. Stretch, sleep, and refuel. That’s when the body adapts, endurance grows, and speed naturally improves.
Example: A 2020 study in the Journal of Strength and Conditioning Research found that runners who added one extra rest day per week saw a 7% improvement in 5K times after six weeks, compared to those who trained continuously.
FAQs
How many miles should I run weekly to get faster?
Most runners improve speed with 15 to 30 miles per week, depending on experience and goals. If you’re new to running, start closer to 15 miles spread over three or four days. Intermediate runners can aim for 25 to 30 miles weekly, adding distance slowly no more than 10% per week.
Advanced runners chasing personal records may run 35+ miles, but even they balance it with rest and strength training. Mileage alone won’t make you faster the right mix of easy runs, intervals, and tempo runs will.
For example: a week with two easy runs, one speed workout, and one long run offers better results than mindlessly logging miles.
Pro tip: Track your total weekly mileage alongside your pace and fatigue level. If pace improves while effort feels steady, you’re on the right track.
Can strength training replace a running day?
Yes one strength day can replace a run and still help you get faster. Running builds endurance, but strength training builds stability and power. Replacing one run with a 30–45 minute strength session focused on core, glutes, hamstrings, and calves can improve your running economy meaning you use less energy to go faster. A strong lower body absorbs impact better, reducing injury risk. Plus, core strength helps maintain good posture when fatigue sets in during long runs or races.
Example: Studies from the Journal of Sports Science & Medicine show that runners who added two weekly strength sessions improved 5K times by 3–4% in just eight weeks. You can use that extra training slot for squats, lunges, deadlifts, and planks your future self (and knees) will thank you.
How long before I notice speed improvements?
You’ll usually start noticing real speed gains within 4 to 6 weeks of consistent training. That’s how long your body typically needs to adapt to new stress building stronger muscles, improving oxygen use, and increasing endurance. The first few weeks may feel tough, but if you stay consistent and recover well, your pace and stamina will improve noticeably. Small changes matter most. Even shaving 10–15 seconds off your mile pace over a month is a solid sign of progress. Keep tracking your intervals, long runs, and recovery heart rate for visible proof of improvement.
Example: A 2021 study from the European Journal of Applied Physiology found that amateur runners saw measurable improvements in pace and fatigue resistance after six weeks of structured speed and endurance training.
Should I run twice a day for faster results?
Running twice a day (double runs) can help advanced runners but isn’t necessary for beginners or intermediates. Elite runners sometimes split mileage into two sessions to reduce fatigue per run and boost overall volume. However, for most people, it’s better to focus on quality over quantity. Doubling up too soon increases the risk of injury and burnout. If you want to try it safely, make one run short and easy for example, 2–3 miles in the morning and a focused workout later in the day. Do this only once or twice a week and watch how your body reacts.
Rule of thumb: If you’re not already running 4–5 days per week comfortably, you don’t need doubles. It’s smarter to add cross-training or extra recovery instead.
-
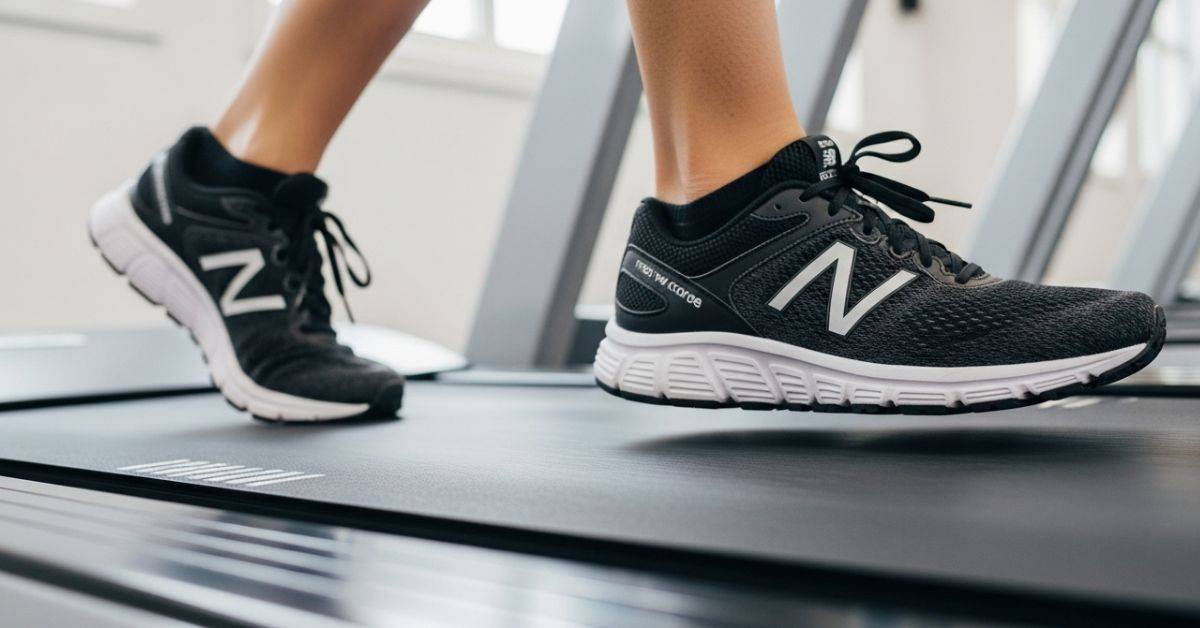 Fitness2 months ago
Why New Balance Running Shoes Are the Perfect Fit for Your Feet
-
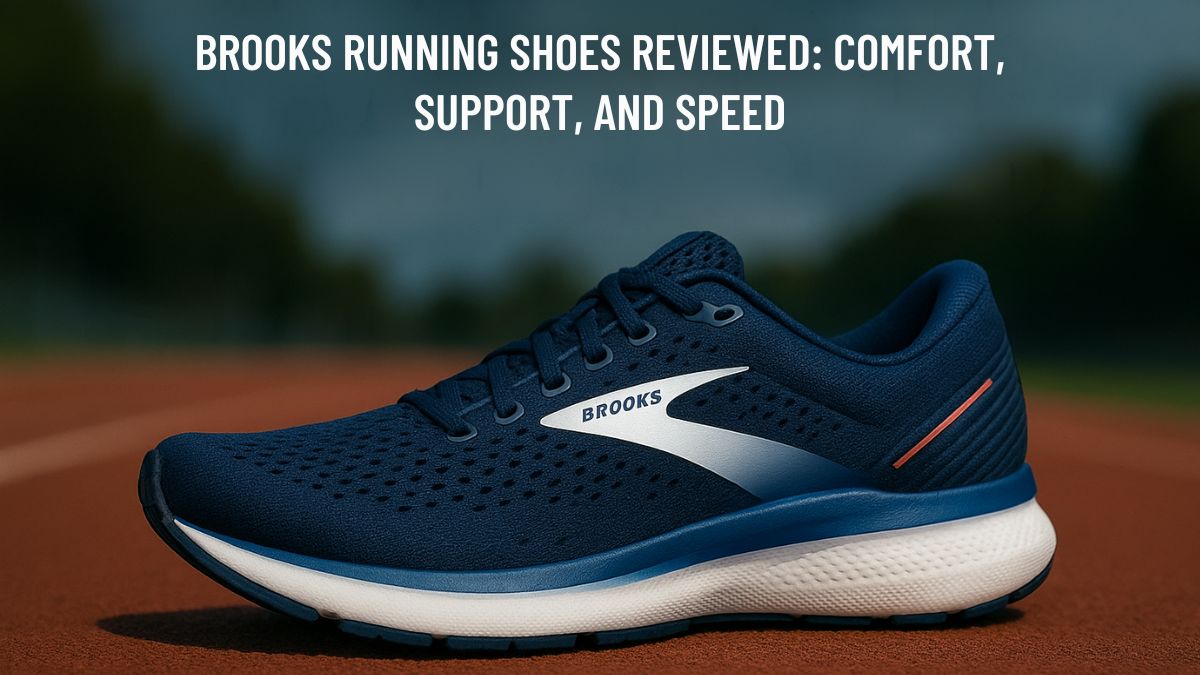 Sports Products2 months ago
Brooks Running Shoes Reviewed: Comfort, Support, and Speed
-
 Sports Products2 months ago
Top 10 Best Shoes for Hyrox to Boost Your Race Performance
-
 Sports Products2 months ago
Why the Nike Hyperko 2 Is the Top Pick for Serious Fighters
-
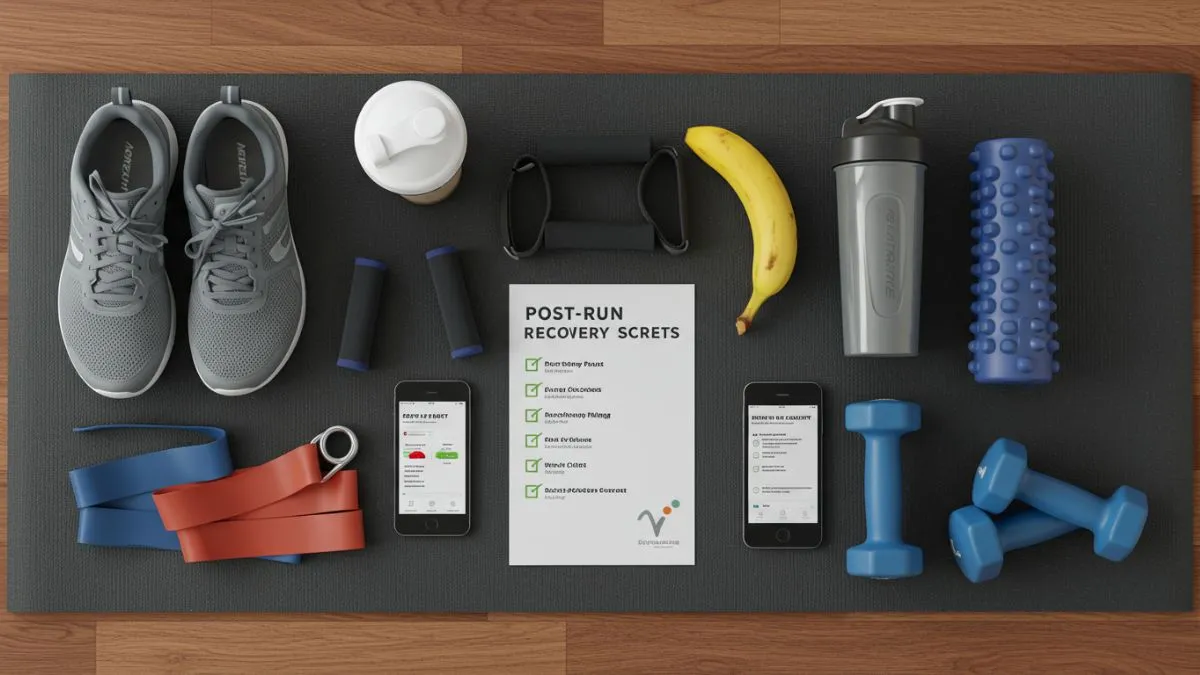 Health2 months ago
Post Run Recovery Secrets: How to Heal Faster and Run Stronger
-
 Sports Products2 months ago
Top 10 Running Shoes of 2025: Comfort, Speed, and Style Combined
-
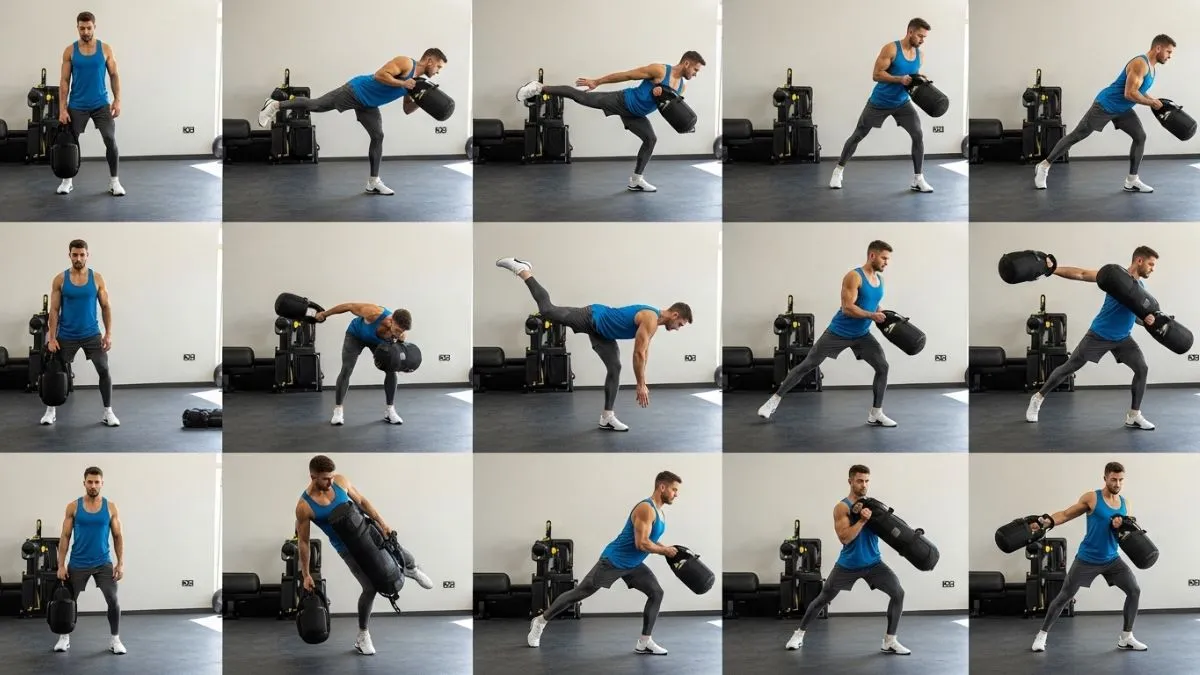 Fitness2 months ago
Best Training Routines for Explosive Sports Legs
-
 Sports Products2 months ago
Asics Novablast 5 Review: Best Running Shoes 2025