
Health
fmybrainsout: Unlocking Creative Flow for Maximum Productivity

Finding ways to boost creativity and mental clarity can feel like chasing shadows, but platforms like fmybrainsout are changing the game. This approach encourages free-flowing ideas and hands-on exploration, making it easier to tap into your cognitive potential. Whether you’re tackling complex projects or simply seeking better mental organization, understanding how fmybrainsout works can be transformative. By embracing these techniques, you can enhance focus, spark creativity, and improve your overall productivity naturally.
What is fmybrainsout and Why It Matters
At its core, fmybrainsout is about externalizing thoughts to reduce cognitive load. By letting ideas flow freely, you prevent mental bottlenecks that slow down problem-solving. This technique aligns closely with practices like mind mapping and journaling, offering a structured yet flexible approach. For professionals and creatives alike, this means less time overthinking and more time turning ideas into tangible outcomes.
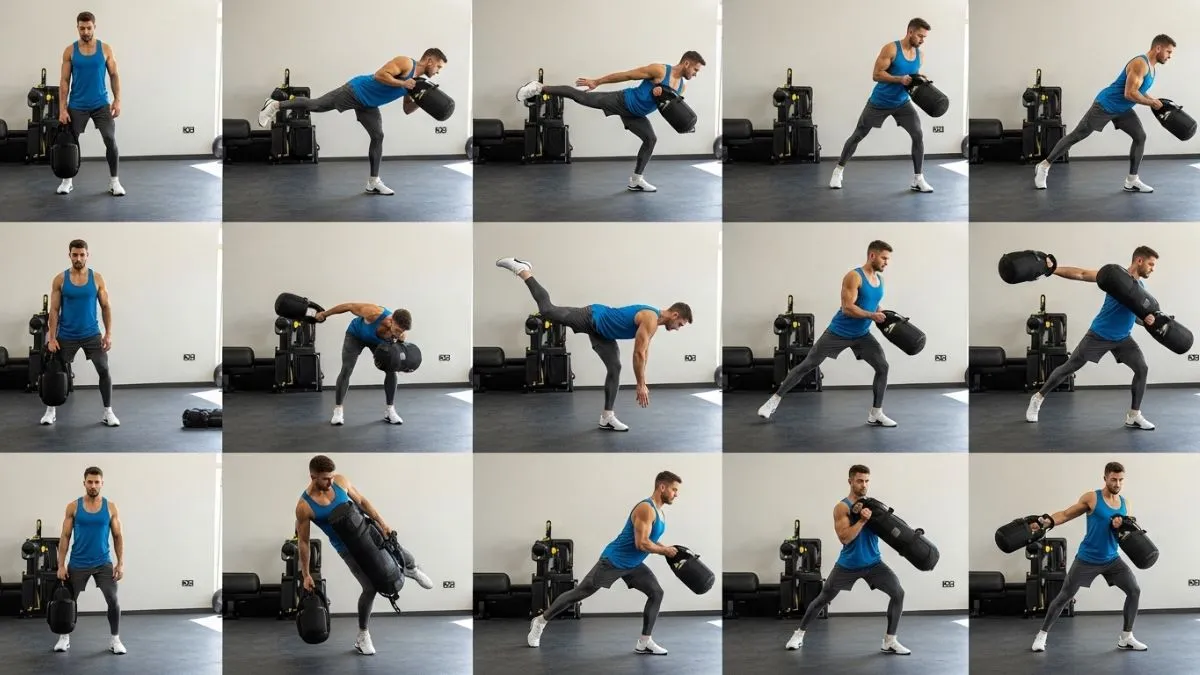
Read More: Top 10 Best Shoes for Hyrox to Boost Your Race Performance
Using fmybrainsout regularly helps train the brain to prioritize important thoughts while filtering out distractions. Instead of wrestling with fragmented ideas, your mind can focus on clarity and action. The mental relief from this practice can improve decision-making, reduce stress, and even enhance memory retention over time.
Moreover, fmybrainsout encourages experimentation. Unlike rigid planning tools, it allows you to explore unconventional ideas without judgment. This can lead to unique solutions and innovative approaches that would otherwise remain buried under mental clutter. Embracing this fluidity fosters both personal growth and professional adaptability.
How fmybrainsout Enhances Creative Flow
Creativity thrives when the mind is unblocked, and fmybrainsout provides a reliable way to achieve this state. By externalizing thoughts, you remove mental friction, allowing connections between ideas to emerge naturally. This free-flowing process often leads to unexpected insights and novel approaches to challenges that seem unsolvable at first glance.
Regular use of fmybrainsout also strengthens cognitive flexibility. When you allow ideas to spill onto paper or digital platforms without restriction, your brain becomes more adept at shifting perspectives. This enhances problem-solving, helping you see multiple angles in complex situations.
Additionally, fmybrainsout reduces the fear of failure in creative endeavors. When ideas are treated as malleable rather than final, experimenting becomes less intimidating. This safe environment fosters a sense of curiosity and play, which is essential for generating innovative and meaningful work.
Practical Techniques to Implement fmybrainsout
Implementing fmybrainsout starts with simple exercises like freewriting or voice recording your thoughts. These methods capture fleeting ideas before they fade, allowing you to revisit and refine them later. The key is consistency; the more you practice, the more naturally your brain will adopt this outward-thinking habit.
Digital tools can also complement this approach. Note-taking apps, digital whiteboards, or task organizers help capture ideas efficiently while maintaining flexibility. The combination of analog and digital methods ensures that your creative flow is never interrupted by logistical hurdles.
Another practical method is structured reflection. By reviewing your notes regularly, patterns emerge, and priorities become clear. This helps transform raw ideas into actionable strategies, ensuring that creativity doesn’t remain abstract but leads to measurable outcomes.
The Role of Focus in fmybrainsout
While fmybrainsout emphasizes free-flowing thoughts, focus remains a crucial element. Capturing ideas without organization can create chaos rather than clarity. Using brief, timed sessions encourages concentration and prevents mental fatigue. This balance ensures that creative energy is harnessed effectively rather than scattered aimlessly.
Incorporating mindfulness techniques enhances this focus further. Practices like deep breathing or short meditation before fmybrainsout sessions help clear residual distractions. A calm mind allows ideas to surface more naturally and improves the quality of insights you capture.
Finally, understanding your peak productivity hours can maximize fmybrainsout’s benefits. Some people perform best in the morning, others at night. Aligning free-flow exercises with your natural rhythm ensures that you engage your brain when it’s most receptive, leading to richer, more actionable ideas.
Overcoming Mental Blocks with fmybrainsout
Mental blocks can halt progress, but fmybrainsout provides a method to bypass them. Writing, sketching, or recording ideas—even seemingly random ones—reduces the internal pressure to “get it right” immediately. This openness often dislodges stuck thoughts and reignites momentum.
The technique also works by reframing challenges. Externalizing problems allows you to see them objectively rather than being trapped in self-critical thinking. This shift in perspective often reveals simple solutions that weren’t obvious when the issue was only in your head.
Another benefit is building resilience against creative fatigue. When ideas are consistently expressed, you develop a habit of continuous mental engagement. Even when facing complex or repetitive tasks, this ongoing practice prevents stagnation and keeps your mind agile.
Integrating fmybrainsout into Daily Life
Fmybrainsout isn’t limited to professional contexts; it’s equally beneficial for personal development. Journaling about daily experiences or recording spontaneous ideas improves self-awareness and emotional clarity. Over time, these reflections contribute to better decision-making and personal growth.
In work settings, brief fmybrainsout sessions during breaks can reinvigorate focus. Capturing lingering thoughts before meetings or brainstorming sessions ensures your mind is free to engage fully in the task at hand. This reduces stress and enhances overall performance.
Socially, sharing insights generated through fmybrainsout can spark collaboration. Discussing ideas with colleagues or friends allows external feedback, refining your thinking and introducing perspectives you might have overlooked. The practice becomes a tool for both creativity and connection.
Common Mistakes to Avoid
A frequent mistake is overthinking the process. Fmybrainsout works best when it’s spontaneous; trying to perfect every idea defeats the purpose. Accepting that not all thoughts are immediately valuable keeps the practice productive and stress-free.
Another pitfall is inconsistency. Skipping sessions or engaging sporadically reduces the habit’s effectiveness. Like any skill, fmybrainsout benefits from regular engagement to strengthen mental pathways and creative confidence.
Finally, ignoring reflection undermines the technique. While free-flowing ideas are essential, reviewing and organizing them is equally important. Without reflection, insights remain scattered, and opportunities to translate creativity into action may be missed.
Read More: Best Leg Workout Machines for Stronger, Sculpted Legs
Conclusion
Incorporating fmybrainsout into your routine can transform the way you think, create, and solve problems. By allowing thoughts to flow freely while maintaining focus and reflection, you unlock a powerful cognitive tool that enhances creativity, productivity, and personal growth. Whether you’re tackling professional projects or exploring personal ideas, this approach provides clarity, reduces mental strain, and nurtures innovation naturally.
Fmybrainsout isn’t just a technique; it’s a mindset shift that makes the creative process more fluid and less intimidating. With consistent practice, you’ll find ideas emerge more readily, solutions become clearer, and your mental energy more effectively directed toward meaningful goals.

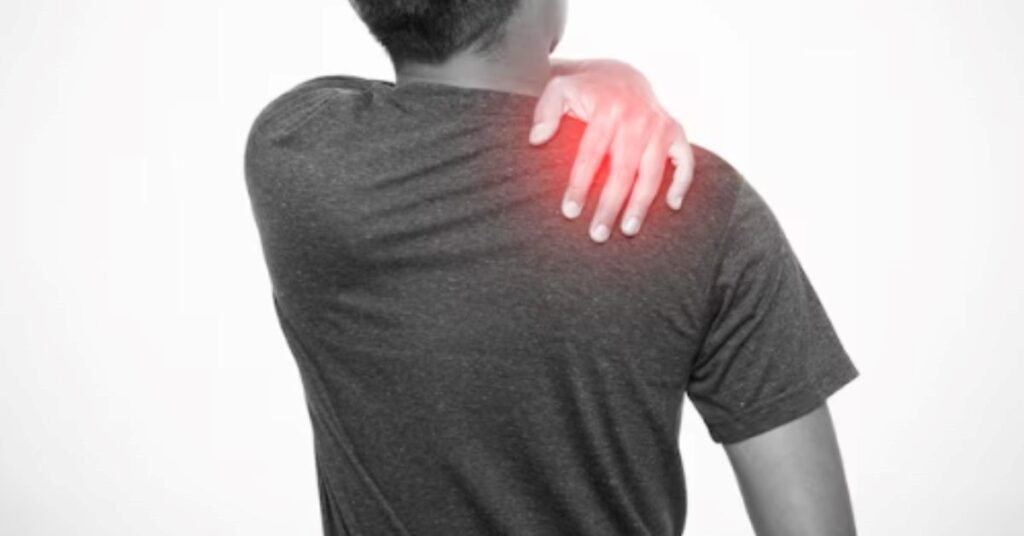
Inomyalgia is a medical term used to describe pain that originates specifically in the muscle fibers themselves. Unlike joint pain or nerve pain, inomyalgia is deep, aching, and often persistent, affecting everyday movement and comfort. Many people experience this condition without realizing its true cause, often confusing it with fatigue or general body soreness. In today’s fast-paced lifestyle filled with stress, sedentary habits, and poor posture, inomyalgia has become increasingly common, silently affecting quality of life.
What Inomyalgia Really Means
The word “inomyalgia” comes from three roots: “ino” meaning muscle fiber, “myo” meaning muscle, and “algia” meaning pain. Together, the term clearly defines pain arising from muscle tissue itself. This pain is not just surface-level discomfort; it often feels deep, tight, burning, or throbbing. It can be localized to a single muscle or spread across multiple muscle groups, making movement uncomfortable and sometimes even unbearable.
How Inomyalgia Differs from Other Muscle Pain
Not all muscle pain is the same, and this is where many people get confused. Common post-exercise soreness usually fades within a day or two, while inomyalgia can linger for weeks or even months. Nerve pain often feels sharp or electric, but inomyalgia feels heavy and aching. Joint pain worsens with movement at specific angles, while muscle-based pain remains even at rest in some cases. This difference is crucial for choosing the right treatment path.
Common Causes of Inomyalgia
Inomyalgia can develop from a wide range of physical, emotional, and medical triggers. Poor posture during work, long hours of sitting, repetitive movements, and overuse of certain muscle groups all play a major role. Emotional stress tightens muscles unconsciously, leading to chronic tension and pain. Dehydration, nutrient deficiencies, infections, hormonal imbalances, and autoimmune conditions can also weaken muscle tissue and trigger persistent muscle discomfort.
The Role of Stress and Mental Health
Stress is one of the most underestimated contributors to inomyalgia. When the body is under continuous mental pressure, it remains in a state of muscle tension. Over time, this tension reduces blood flow, limits oxygen delivery, and causes a buildup of waste products in muscle tissues. The result is soreness that doesn’t easily fade. Anxiety, depression, and emotional burnout can quietly turn into physical muscle pain without any visible injury.
Symptoms You Should Not Ignore
Inomyalgia doesn’t just show up as mild soreness. Common symptoms include deep muscle aches, stiffness, weakness, burning sensations, tenderness to touch, and reduced flexibility. Some people also report fatigue, sleep disturbances, and reduced stamina. The pain may worsen in cold weather, during periods of inactivity, or after prolonged physical effort. Ignoring these warning signs can allow the condition to become chronic and harder to treat.
How Inomyalgia Is Diagnosed
There is no single lab test that confirms inomyalgia instantly. Doctors usually rely on detailed medical history, physical examination, and elimination of other causes like nerve disorders or joint diseases. They may press on muscles to identify tender points and assess mobility. Blood tests may be ordered to rule out inflammation, infections, or autoimmune diseases. Imaging tests are rarely required unless serious underlying conditions are suspected.
Inomyalgia and Modern Lifestyle Habits
The modern lifestyle is a perfect breeding ground for muscle pain disorders. Long hours at desks, excessive screen time, lack of movement, poor sleeping posture, and unhealthy diets all strain muscle health. Muscles are designed to move regularly and receive proper nutrition. When movement is restricted and nutrition is compromised, muscles lose elasticity, become fatigued quickly, and are more prone to painful spasms and micro-injuries.
The Connection Between Inomyalgia and Fibromyalgia
Inomyalgia is sometimes confused with fibromyalgia, but they are not identical. Fibromyalgia is a widespread pain condition linked with nervous system sensitivity, sleep problems, and fatigue. Inomyalgia, on the other hand, is primarily muscle-fiber based pain. However, both conditions can overlap. Some people with fibromyalgia experience inomyalgia in specific muscle regions, making accurate diagnosis even more important.
Effective Medical Treatment Options
Medical management of inomyalgia depends on severity and underlying causes. Doctors may prescribe muscle relaxants, anti-inflammatory drugs, or mild pain relievers to control symptoms. In cases where the pain is linked with infections or autoimmune disorders, targeted medications are required. Physical therapy is often one of the most effective treatments, as it helps restore muscle strength, flexibility, and proper movement patterns without relying heavily on medication.
Physical Therapy and Movement-Based Recovery
Movement is medicine for inomyalgia when done correctly. Gentle stretching, guided exercises, posture correction, and manual therapy can significantly reduce muscle pain. Physical therapists focus on activating weak muscles, relaxing tight ones, and retraining movement patterns that reduce strain. Over time, consistent therapy improves circulation, reduces muscle stiffness, and restores confidence in daily movement.
Natural Remedies for Inomyalgia Relief
Nature offers powerful tools to manage muscle pain safely. Warm compresses and heat therapy relax tense muscles and improve blood flow. Cold packs reduce inflammation during flare-ups. Herbal remedies like turmeric, ginger, and magnesium-rich foods support muscle recovery from within. Hydration is often overlooked but remains essential, as dehydrated muscles are more prone to pain and cramping.
The Power of Nutrition in Muscle Healing
Muscle health depends heavily on proper nutrition. Protein supports muscle repair, while minerals like magnesium, calcium, and potassium regulate muscle contractions. Vitamin D strengthens muscles and bones, and B-complex vitamins support nerve-muscle coordination. Diets high in processed foods, sugar, and caffeine can worsen inflammation and fatigue, making inomyalgia symptoms more intense over time.
Exercise Without Making the Pain Worse
Many people fear movement when they experience muscle pain, but complete inactivity often makes inomyalgia worse. The key is low-impact exercise such as walking, swimming, yoga, and cycling. These activities improve circulation without overloading the muscles. Regular movement flushes out toxins, improves flexibility, and gradually rebuilds muscle resilience, helping prevent future pain episodes.
Sleep and Its Role in Muscle Recovery
Sleep is the body’s natural repair workshop. During deep sleep, growth hormones are released that repair muscle tissue and reduce inflammation. Poor sleep quality leads to increased pain sensitivity, slower recovery, and chronic fatigue. Creating a consistent sleep routine, improving mattress support, and reducing screen time before bed can dramatically improve symptoms of inomyalgia.
Posture Correction and Ergonomics
Bad posture silently strains muscles all day long. Rounded shoulders, forward head posture, and slouched sitting overload neck, shoulder, and back muscles. Simple ergonomic adjustments like proper chair height, screen positioning, lumbar support, and regular movement breaks can prevent unnecessary muscle tension and protect against recurring inomyalgia.
Emotional Well-Being and Pain Perception
Pain is not just physical; it is deeply tied to emotional health. Chronic stress heightens pain sensitivity by overstimulating the nervous system. Mindfulness, meditation, breathing exercises, and relaxation techniques calm the body and reduce the intensity of muscle pain. When emotional balance improves, physical pain often follows a similar healing path.
When Inomyalgia Becomes Chronic
Acute muscle pain that lasts a few days is usually harmless, but when inomyalgia persists for months, it becomes a chronic condition. Chronic inomyalgia can interfere with work, sleep, mood, and relationships. Early intervention is crucial to prevent this progression. A combination of physical therapy, lifestyle changes, emotional balance, and medical guidance offers the best long-term outcomes.
Preventing Inomyalgia Before It Starts
Prevention is always easier than treatment. Staying physically active, maintaining good posture, managing stress, staying hydrated, and eating a balanced diet go a long way in protecting muscle health. Warming up before exercise and stretching afterward reduce the risk of muscle injury. Listening to your body’s early warning signs helps stop minor discomfort from turning into chronic pain.
Living a Full Life with Inomyalgia
A diagnosis of inomyalgia does not mean a life limited by pain. With the right approach, many people regain full mobility and comfort. Recovery is not about quick fixes but building healthy habits that support muscles daily. Patience, consistency, and self-care form the foundation of lasting relief and stronger, pain-resistant muscles.
Conclusion
Inomyalgia is more than just ordinary muscle pain—it is a condition that reflects the health of your muscles, lifestyle, nutrition, and emotional well-being. While it can be frustrating and limiting, it is also highly manageable with the right strategies. From medical treatment and physical therapy to natural remedies and stress control, a well-rounded approach brings the best results. By understanding the true nature of inomyalgia and responding early, you can break free from constant discomfort and return to a more active, pain-free life.
FAQs
1. Is inomyalgia a serious condition?
Inomyalgia itself is not usually life-threatening, but if ignored, it can become chronic and significantly affect daily life and productivity.
2. Can inomyalgia go away on its own?
Mild cases can improve with rest and proper care, but persistent inomyalgia usually requires lifestyle changes and targeted treatment.
3. Does stress really cause muscle pain?
Yes, chronic stress keeps muscles in a constant state of tension, reducing oxygen supply and increasing pain sensitivity.
4. What is the fastest natural way to relieve inomyalgia?
Heat therapy, hydration, gentle stretching, and magnesium intake often provide rapid relief for muscle-based pain.
5. Should I avoid exercise if I have inomyalgia?
No, completely avoiding movement can worsen the condition. Gentle, low-impact exercise is usually beneficial and speeds up recovery.
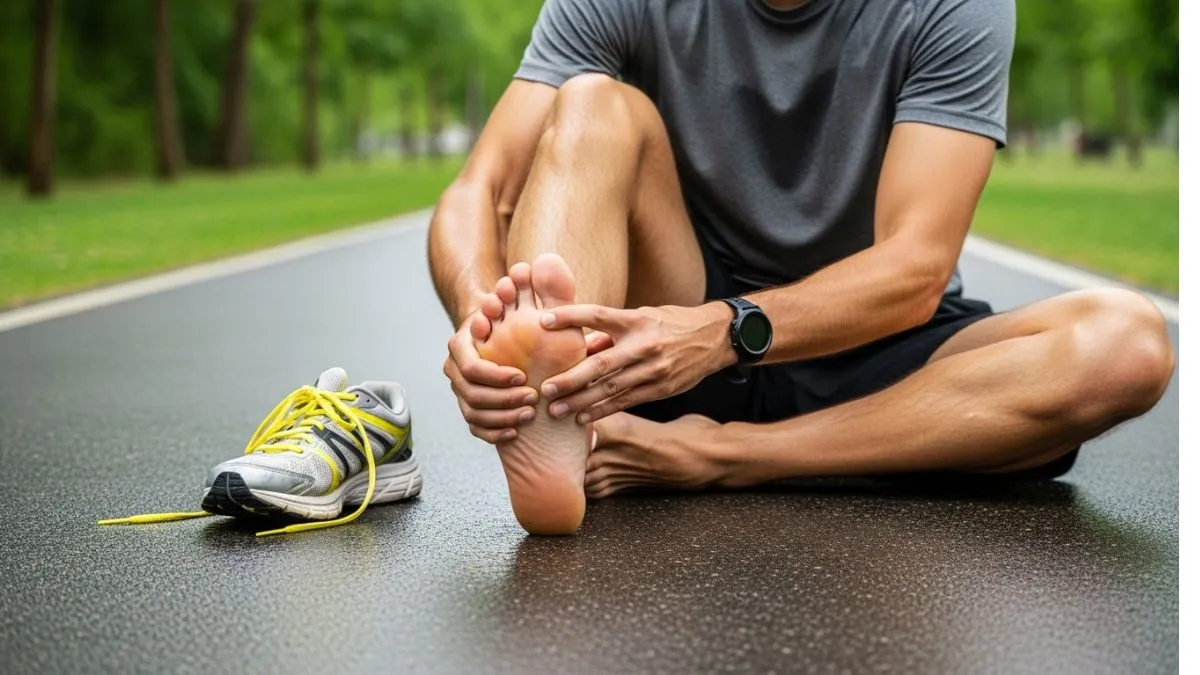
Introduction: Understanding Arch Pain After Running
Your arches hurt after running because the muscles and ligaments in your feet are under stress from repeated impact. It’s a common issue among runners, often linked to overuse, poor shoes, or weak foot muscles. The pain can feel like a dull ache, tight pull, or even a sharp sting after long runs. Yes, arch pain after running can be normal but only to a point. If the discomfort fades after rest or light stretching, it’s likely due to temporary strain. But if it keeps coming back, or gets worse with every run, that’s your body’s way of saying something’s off.
You shouldn’t keep running through arch pain. Pushing past it can turn a small strain into a lasting injury. Taking short breaks, switching shoes, or adjusting your form early can stop it from turning into something more serious like plantar fasciitis. In this article, you’ll learn the real reasons behind arch pain after running, simple ways to fix it fast, and practical habits that keep your feet healthy for the long run. Everything here is based on real running experience and expert-backed tips that work in the real world not theories or guesswork.
What Causes Arch Pain After Running?
Arch pain after running isn’t random it’s usually your body reacting to specific stress points. Understanding the cause helps you fix it faster and avoid repeat pain. Let’s look at the most common reasons runners face this issue.
Overuse and Muscle Fatigue
Arch pain often comes from overuse when your foot muscles work harder than they should, too often, without enough rest. Every stride stretches and tightens the tissues in your feet. Over time, those tissues tire out, especially if you’re running long distances or increasing mileage too quickly. When the arch muscles fatigue, they can’t support your body weight properly. That’s when discomfort turns into pain. Think of your arches as springs when they’re overworked, they lose bounce and stability.
Poor Footwear Choices
Shoes without solid arch support are one of the biggest culprits behind arch pain. When your running shoes lose cushioning or arch structure, your feet take the hit directly. Each step adds stress that good shoes should’ve absorbed. Old, worn-out soles also make your arches flatten more than they should. Over time, that stretching pulls on the plantar fascia the ligament that connects your heel to your toes and creates sharp or throbbing pain.
Flat Feet or Fallen Arches
If you’ve got flat feet or fallen arches, your foot’s natural curve collapses each time it hits the ground. This collapse overstretches ligaments and makes every stride feel heavier on the arch. The pain often feels like pressure spreading from the middle of the foot outward. For runners with this condition, long-term performance can dip because their feet tire faster and recover slower. Without enough arch lift, stability drops like running on soft sand where your feet sink a bit with every step. Supportive shoes and targeted exercises can help lift and strengthen those arches, reducing fatigue and improving running endurance.
Plantar Fasciitis Connection
Plantar fasciitis is a common condition where the thick band of tissue under your foot (the plantar fascia) gets inflamed. It’s one of the main causes of sharp arch pain, especially when you take your first steps after a run or a long rest. The pain usually starts at the heel and moves toward the arch. Runners often describe it as a stabbing or burning feeling. It can be triggered by too much mileage, tight calves, or running shoes that don’t support your foot shape.
Running Surface and Technique
Hard or uneven surfaces can make arch pain worse because they increase impact and pressure on your feet. Running on concrete gives almost no shock absorption, forcing your arches to handle all the stress. Poor technique adds to the problem. Overstriding (landing too far ahead of your body) or striking the ground too hard amplifies impact. Small adjustments like shortening your stride or landing midfoot instead of heel-first can take a lot of pressure off. If possible, switch up your training surface. Softer terrains like grass, dirt trails, or modern running tracks help reduce shock and protect your arches from repetitive stress.
How to Fix Arch Pain After Running
Arch pain doesn’t have to linger. With a few simple fixes and a little consistency, you can calm the soreness, strengthen your feet, and get back to running without pain. Here’s how to do it the right way.
Immediate Relief Methods
The quickest way to ease arch pain after running is through rest, ice, gentle stretching, and light compression. These steps reduce swelling and let the strained muscles recover faster. Start by taking a short break from running for a day or two. Rest gives your arches time to repair the small tears that cause soreness. Then, apply an ice pack wrapped in a thin towel for 15–20 minutes at a time, about two to three times a day. That’s the sweet spot for cooling inflammation without damaging tissue. Follow with simple stretches. Try pulling your toes toward you while sitting or rolling your foot over a cold water bottle. Add light compression with an elastic wrap if the pain feels sharp or swollen.
Strengthening Exercises for Arch Support
Strong arches handle impact better and recover faster. A few simple exercises can rebuild strength in your feet and stop future pain.
Try these:
- Towel Scrunches: Sit in a chair, place a towel under your foot, and pull it toward you using your toes. Do 2–3 sets daily.
- Heel Raises: Stand on both feet, lift your heels slowly, then lower them down. Repeat 10–15 times. This strengthens your calves and arches.
- Toe Curls: Pick up small objects like marbles or a pen with your toes. It sounds simple, but it builds solid control in the arch muscles.
- Foot Roll: Use a tennis ball or massage roller under your foot for one minute per arch to loosen tight tissue.
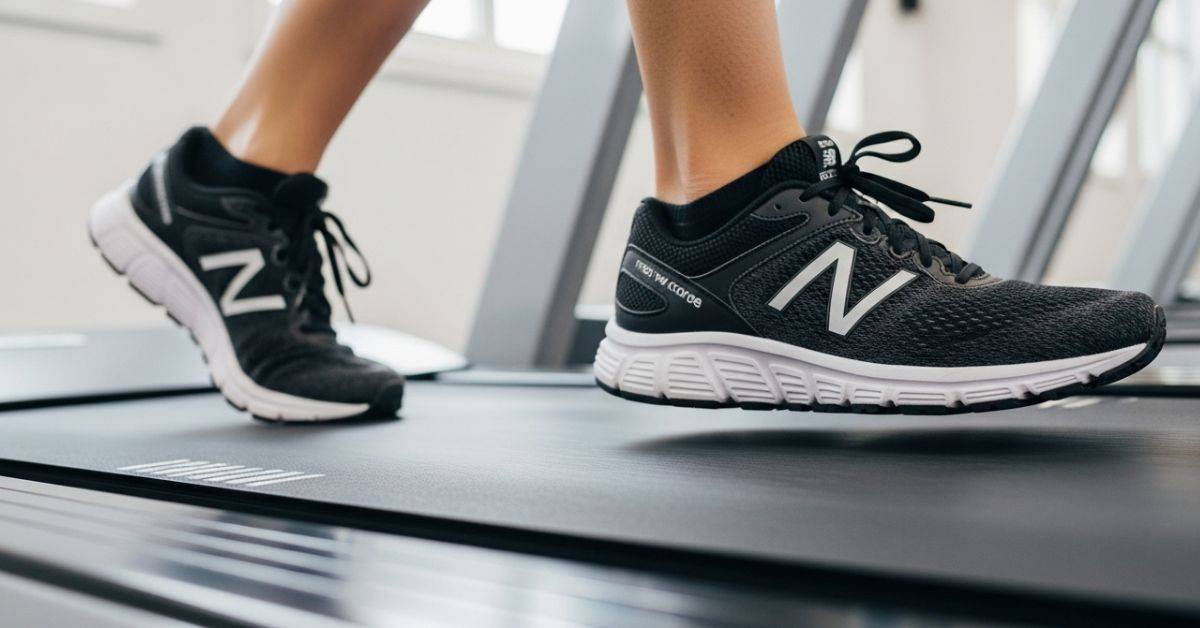
Choosing the Right Running Shoes
Good shoes make all the difference when dealing with arch pain after running. Look for pairs with proper arch support, firm midsoles, and enough cushioning to absorb shock. Your shoes should match your running style. If you’re a flat-footed runner, go for motion-control shoes with firmer support. If you’ve got high arches, look for models with soft midsoles that allow more flex. Sizing matters too. Your toes should have about a thumb’s width of space from the shoe’s front. Tight shoes strain your arches, while loose ones reduce support. Replace running shoes every 300–500 miles, depending on how often you run and the surface you use.
When to Use Orthotic Inserts
Orthotic inserts can help stabilize your arches and correct foot alignment. You can find two main types: custom orthotics (made by specialists to fit your exact foot shape) and over-the-counter options (available in most sports stores). Custom orthotics are best if you’ve got flat feet, recurring arch pain, or conditions like plantar fasciitis. They provide tailored support where your foot needs it most. Over-the-counter inserts, however, work well for minor discomfort and everyday use. If pain doesn’t improve after a few weeks of rest, stretching, and better shoes, it’s smart to consult a podiatrist. They can analyze your gait, spot underlying issues, and recommend the right orthotic setup for you.
Massage and Recovery Tools
Massaging your arches can relieve tension, improve blood flow, and speed up healing. You don’t need fancy gear simple tools can do the job. Start with a tennis ball or massage roller under your foot. Roll gently from heel to toes for about one minute per side. Focus on tight spots but avoid pressing too hard. You can also use your thumbs to knead the arch in small circles after runs. Foam rolling your calves helps too. Tight calves can pull on your arch tissue, so loosening them reduces strain below.
How to Prevent Arch Pain After Running
Warm-Up and Stretch Before Runs
One of the most effective ways to prevent arch pain after running is by dedicating time to proper warm-up and stretching routines. When your muscles, tendons, and ligaments are tight, they place additional strain on the arches of your feet during movement. A dynamic warm-up such as ankle rolls, calf raises, or light jogging helps improve blood circulation and flexibility, reducing the risk of micro-tears in the plantar fascia. Studies show that runners who engage in structured warm-up sessions experience up to a 40% lower injury rate, highlighting its critical role in injury prevention.
Follow a Balanced Training Plan
A well-structured training plan is essential for protecting your arches from overuse and strain. Running too frequently or increasing your mileage too quickly can overload the plantar fascia, leading to inflammation or even chronic pain. To avoid this, follow the 10% rule, which suggests increasing your weekly mileage by no more than 10% to allow your body to adapt gradually. Additionally, incorporating rest days and cross-training (like swimming or cycling) helps your muscles recover and reduces repetitive stress on the feet. Remember, balance is the foundation of endurance—both for your body and your arches.
Maintain a Healthy Weight
Your body weight plays a significant role in determining how much stress your feet endure with every step. Each pound of body weight exerts roughly three to four times its force on the foot during a run. Therefore, even slight changes in weight can influence foot mechanics and arch pressure. Maintaining a healthy weight not only improves running efficiency but also reduces the likelihood of arch fatigue and inflammation. Pairing regular exercise with a balanced diet rich in lean proteins, whole grains, and anti-inflammatory foods supports both foot health and overall performance.
Regular Foot Care and Maintenance
Long-term prevention of arch pain requires consistent foot care and attention to detail. Check your running shoes regularly—most should be replaced every 300–500 miles—to ensure proper arch support and shock absorption. Inspect your arches for soreness, swelling, or visible flattening that might indicate strain. Simple maintenance practices, such as keeping your feet moisturized, staying hydrated, and using a lacrosse ball or foam roller for massage, can enhance recovery and flexibility. Scheduling a monthly self-check or an occasional visit to a podiatrist ensures small issues are addressed before they turn into painful setbacks.
When to See a Doctor
Signs It’s More Than Simple Strain
While mild arch pain after running can often be managed with rest and at-home care, some symptoms signal something more serious that requires professional attention. If your pain persists for more than two weeks, worsens with activity, or includes sharp, stabbing sensations in the arch or heel, it’s time to see a doctor. Persistent swelling, redness, or warmth around the foot may also indicate inflammation or an underlying injury, such as plantar fasciitis, stress fractures, or tendon damage. Alarmingly, studies suggest that over 60% of runners ignore chronic arch pain until it significantly interferes with performance or daily life. Ignoring these red flags can lead to long-term complications, making early diagnosis crucial for proper healing.
Diagnostic Options and Treatments
When you visit a healthcare professional, the first step is typically a physical examination, where the doctor checks your gait, arch shape, and pain response. Depending on the symptoms, imaging tests like X-rays or MRIs may be used to rule out fractures, ligament tears, or severe inflammation. Treatment often starts with conservative options, including physical therapy, custom orthotics, and supportive footwear designed to correct alignment and relieve pressure on the arch.
In more persistent cases, your doctor might recommend corticosteroid injections or specialized stretching programs. Recovery time varies by condition mild cases can improve within a few weeks, while more severe issues may take two to three months of consistent treatment and rest to fully heal. With timely intervention, most runners can safely return to their training routines without long-term damage.
Practical Tips for Pain-Free Running
Running should energize you not leave you limping afterward. If you’re dealing with arch pain, incorporating a few simple habits into your routine can make a major difference. Here’s a short, actionable checklist designed to keep your feet strong, your arches supported, and your runs enjoyable.
- Stretch daily: Take five minutes before and after each run to stretch your calves, Achilles tendons, and the bottoms of your feet. These areas are directly connected to your arches, and flexible muscles reduce tension and prevent strain.
- Replace worn shoes: Even the best running shoes lose support over time. Replace them every 300–500 miles or sooner if you notice the soles wearing unevenly. Running in worn-out shoes is one of the top causes of recurring arch pain.
- Strengthen feet weekly: Dedicate time each week to simple foot exercises like towel scrunches, toe curls, and heel raises. These moves build the small stabilizing muscles that protect your arches from fatigue.
- Run on mixed terrain: Alternating between grass, trails, and pavement can reduce repetitive stress. Softer surfaces cushion the impact and allow your feet to recover while still maintaining endurance.
- Rest when pain starts: Never push through discomfort. Taking a day or two off early can prevent a minor ache from developing into chronic injury. Listen to your body—it’s your best injury prevention tool.
Final Thought
Arch pain after running doesn’t have to derail your fitness goals. With the right mix of awareness, recovery, and prevention, you can protect your arches and enjoy running comfortably for years to come. Remember—healthy feet start with small, consistent steps like stretching regularly, rotating your running shoes, and building strength through simple foot exercises.
Maintaining balanced training habits, keeping your weight in check, and listening to your body’s warning signs are just as vital as the miles you run. Prioritize recovery, respect rest days, and make foot care part of your weekly routine to keep every stride pain-free.
FAQs
Can I still run with arch pain?
You shouldn’t run with arch pain until it eases. Running through pain can make small strains worse and may lead to long-term issues like plantar fasciitis. Take a few days off, ice the area, and stretch your feet daily. Once the pain subsides, ease back with short, low-impact runs.
What’s the best arch support for runners?
The best arch support fits your foot type and running style. Runners with flat feet often need firm, structured insoles, while high arches benefit from cushioned support that absorbs shock. Shoe stores with gait analysis tools can help match you to the right support for your stride.
Does running barefoot help or hurt?
Running barefoot can help some runners but hurt others. It strengthens small foot muscles but removes protective cushioning. Transitioning too quickly can strain your arches. If you want to try it, start slow short runs on soft grass or sand and let your feet adapt gradually.
How long does arch pain take to heal?
Most mild arch pain heals within 1–3 weeks with rest and care. Severe cases or those linked to plantar fasciitis can take up to 8 weeks. Consistent icing, stretching, and supportive footwear speed up recovery. Avoid long runs until your feet feel fully stable and pain-free.
Can arch pain cause other injuries?
Yes, untreated arch pain can trigger chain reactions in your body. When your arches hurt, your gait changes, which stresses your knees, hips, and back. Over time, this imbalance may cause injuries like shin splints or IT band syndrome. Fixing arch pain early prevents bigger problems later.

Introduction
The Best full leg compression sleeve for recovery is the Zensah Full Leg Compression Sleeve. It supports muscles from hip to ankle, boosts blood flow, and reduces soreness after intense workouts. This sleeve fits snugly without cutting circulation, making it ideal for post-training recovery or long runs. If you’ve ever felt your legs heavy or sore after leg day, you know recovery matters. A compression sleeve helps your muscles heal faster by improving oxygen flow and reducing swelling.
Whether you’re lifting weights, running, or cycling, wearing one can make a noticeable difference in how quickly you bounce back. Some people wonder if it’s better to wear a sleeve during or after exercise. Here’s the truth: you can do both. During activity, it stabilizes muscles and limits vibration. Afterward, it speeds up the healing process by keeping circulation steady. The result? Less soreness and quicker recovery.
In this post, we’ll compare the best full leg compression sleeves for muscle recovery, explain how they work, and help you find one that fits your lifestyle. You’ll learn what features to look for, when to wear it, and what real users say about the top-rated options.
What Is a Full Leg Compression Sleeve?
A full leg compression sleeve is a tight, elastic garment that covers your leg from thigh to ankle, supporting muscles and improving blood circulation. It’s designed to reduce swelling, ease soreness, and help your muscles recover faster after workouts. The sleeve applies gentle pressure across the leg, which helps blood move efficiently back toward your heart. That steady flow brings oxygen to tired muscles and removes waste like lactic acid the main cause of post-workout stiffness. When circulation improves, your legs feel lighter, stronger, and less fatigued.
Most full leg compression sleeves are made of a mix of nylon, spandex, and elastane. This blend gives them a stretch that moves with you, keeping compression firm but comfortable. They usually extend from the upper thigh down to just above the ankle, providing complete leg coverage. When worn correctly, the sleeve should feel snug but not restrictive.
You shouldn’t feel numbness or pinching. Instead, it should give a light, supportive hug almost like a second skin. If you feel tingling or your toes go cold, it’s likely too tight and needs adjusting. Athletes often compare the feeling to a steady, reassuring pressure that keeps their muscles in check. It’s not about squeezing hard it’s about staying supported, stable, and comfortable while your body does the repair work.
How Compression Sleeves Aid Muscle Recovery
Compression sleeves help muscles recover faster by improving blood circulation, reducing swelling, and speeding up the removal of lactic acid. They gently squeeze your leg, keeping oxygen-rich blood flowing while pushing waste products out of tired muscles. This steady pressure helps your legs feel fresher after intense workouts. When you train hard, your muscles produce lactic acid as a byproduct of energy use. That’s what causes that heavy, sore feeling afterward. A full leg compression sleeve keeps blood moving efficiently, which helps clear lactic acid faster.
Better circulation also means more oxygen reaches muscle tissue, allowing cells to repair themselves sooner. Think of it like traffic control for your bloodstream compression sleeves make sure there’s no “traffic jam” in your legs. By promoting smooth flow, they reduce inflammation and fluid buildup, which are the main reasons for next-day soreness. Post-exercise timing also plays a role. The best time to wear your compression sleeve is right after your workout.
This is when your muscles are warm, expanded, and most in need of recovery support. Many athletes wear them for a few hours after training or during rest days to help the body bounce back naturally. Some users even find that wearing compression sleeves while traveling or sitting for long hours helps prevent stiffness. That’s because the benefits of improved circulation apply whether you’re running on a track or sitting at a desk.
Key Features to Look For in a Full Leg Compression Sleeve
The best full leg compression sleeve fits snugly, stays breathable, and uses graduated pressure to boost circulation without causing discomfort. Getting the right mix of fit, fabric, and design determines how well your sleeve supports recovery and long-term comfort.
Fit and Size Accuracy:
A proper fit is the foundation of effectiveness. Too tight, and it restricts blood flow; too loose, and it does nothing at all. Look for brands that provide detailed sizing charts based on calf, thigh, and leg length measurements. A sleeve should slide on smoothly without rolling or pinching.
Breathability and Moisture Control:
Sweat buildup can cause irritation during or after workouts. Quality sleeves are made from moisture-wicking materials like nylon-spandex blends that let air circulate while keeping your legs dry. This feature helps prevent chafing and keeps your legs cool even during long runs or gym sessions.
Graduated Compression Levels:
This is the secret to better performance and recovery. Graduated compression means the pressure is strongest at the ankle and gradually decreases toward the thigh. This gradient encourages upward blood flow, preventing fluid buildup and reducing fatigue. Most top-rated sleeves have a compression range between 15–30 mmHg ideal for both athletes and recovery users.
Stitch Quality and Comfort Bands:
Strong stitching ensures durability, especially if you wear your sleeve daily. Flatlock seams help prevent skin irritation. Elastic comfort bands at the top and bottom keep the sleeve in place without digging into your skin. If you feel any slipping or tight marks after wearing, it’s a sign to adjust your size.
All these details might sound small, but together, they shape how effective your compression sleeve will be. Think of it like tuning a guitar each string (or feature) must be balanced to get the best result.
Best Full Leg Compression Sleeves for Muscle Recovery
Choosing the right sleeve depends on your goals speedier recovery, pain relief, or daily comfort. Below are five top-rated full leg compression sleeves tested by athletes, trainers, and rehab users. Each option stands out for its design, durability, and effectiveness.
1. Zensah Full Leg Compression Sleeve
The Zensah Full Leg Compression Sleeve delivers powerful, even pressure across the leg, helping athletes recover faster and stay pain-free after long runs or tough workouts. Its seamless fabric and targeted compression zones make it a favorite among runners and gym-goers alike.
Pros:
- Graduated compression supports circulation from ankle to thigh
- Seamless design reduces irritation
- Quick-dry, breathable material
- Excellent muscle stabilization during activity
Cons:
- Slightly expensive compared to others
- Limited color options
2. CEP Full Leg Compression Sleeve
The CEP Full Leg Compression Sleeve provides medical-grade compression that maintains blood flow while reducing fatigue during and after workouts. It’s known for its precise sizing and exceptional comfort even during long training sessions. This sleeve offers slightly firmer compression than Zensah, making it a better fit for users who prefer more structured support. The fabric’s breathability and stretch balance make it ideal for both recovery and performance use.
Pros:
- Medical-grade compression certified for therapeutic use
- Soft, moisture-wicking material
- Retains elasticity even after multiple washes
- Excellent for both recovery and endurance training
Cons:
- May feel tighter for beginners
- Slightly longer break-in period
3. 2XU Recovery Compression Sleeve
The 2XU Recovery Compression Sleeve is built for durability and tight compression, helping reduce leg soreness after intense leg days or marathons. It’s one of the most trusted choices among professional athletes for post-exercise muscle recovery. Users often praise its long-lasting elasticity and strong yet comfortable pressure. Many note feeling lighter legs the next day after using it post-training. The fabric resists pilling and maintains shape over time, making it worth the investment.
Pros:
- Strong compression range (20–30 mmHg)
- Excellent durability and fade resistance
- Maintains tight fit even after months of use
- Ideal for recovery after high-intensity workouts
Cons:
- Slightly stiff during the first wear
- Not ideal for casual daily use
4. McDavid Full Leg Compression Sleeve
The McDavid Full Leg Compression Sleeve provides reliable muscle and joint support, especially for users recovering from minor injuries or knee discomfort. It combines compression and flexibility for active recovery and light sports use. Its open-knit design improves breathability, while the reinforced knee section adds stability where it’s needed most. Many physical therapists recommend McDavid for older athletes or those in rehab.
Pros:
- Great knee and joint support
- Soft inner lining for comfort
- Durable and easy to clean
- Helps prevent strain during workouts
Cons:
- Slightly heavier fabric
- Less sleek design compared to others
5. Copper Fit Leg Compression Sleeve
The Copper Fit Leg Compression Sleeve offers solid recovery support at an affordable price, with copper-infused fibers designed to reduce odor and keep the fabric fresh. It’s perfect for light workouts and all-day wear. The compression is mild compared to Zensah or 2XU, making it more suitable for beginners or casual fitness users. It’s easy to slip on, comfortable for extended wear, and provides just enough pressure for everyday leg comfort.
Pros:
- Affordable price
- Copper-infused material reduces odor
- Lightweight and breathable
- Comfortable for long-term wear
Cons:
- Lower compression level
- May stretch over time with daily use
Example layout:
| Brand | Compression Level | Comfort | Durability | Best For |
| Zensah | 20–30 mmHg | High | Excellent | Runners, gym-goers |
| CEP | 25–30 mmHg | High | Excellent | Long-distance training |
| 2XU | 20–30 mmHg | Medium | Superior | Post-leg-day recovery |
| McDavid | 15–25 mmHg | Very High | Good | Injury prevention |
| Copper Fit | 10–20 mmHg | Moderate | Fair | Everyday wear |
When and How to Use a Full Leg Compression Sleeve
A full leg compression sleeve can make a noticeable difference in your muscle recovery routine but timing and usage matter. Understanding when and how to wear it helps you get the most benefit while avoiding overuse or discomfort. When it comes to timing, compression sleeves are versatile. Before workouts, wearing them for 15–30 minutes can improve blood circulation and warm up muscles, reducing the risk of strains.
During workouts, they provide stability, especially for activities involving repetitive motion like running, cycling, or HIIT. After exercise, they are most beneficial promoting faster recovery by helping flush out lactic acid and minimizing muscle swelling. Most fitness experts recommend wearing them for 1–3 hours post-workout to enhance recovery. It’s also crucial to use compression sleeves safely. They should fit snugly but not feel overly tight. A good test is to check your toes if they feel numb or tingly, the sleeve is too tight.
Always start with shorter wear durations and increase gradually as your body adjusts. Avoid sleeping in compression sleeves unless recommended by a medical professional, as prolonged compression can sometimes reduce circulation when lying still. When used correctly, full leg compression sleeves strike a perfect balance between performance enhancement and muscle recovery. They support the body’s natural healing process without restricting flexibility or comfort making them a key recovery tool for both athletes and casual fitness enthusiasts.
| Activity Type | Before Workout | During Workout | After Workout |
| Running | 15 min | Yes (optional) | 1–2 hours |
| Cycling | 20 min | Yes | 1 hour |
| Gym/Strength Training | Optional | No | 1–3 hours |
| Long Travel/Standing | — | Yes | — |
Common Mistakes People Make with Compression Sleeves
Even the best full leg compression sleeve won’t deliver results if it’s used incorrectly. Many fitness enthusiasts and recovery-focused athletes make simple mistakes that limit effectiveness or cause unnecessary discomfort. Understanding these errors helps you maximize the sleeve’s benefits safely and efficiently. One of the most common issues is wearing the wrong size. Compression sleeves are designed to apply precise pressure too tight and they restrict circulation, too loose and they fail to provide any real compression benefit.
Always use the manufacturer’s sizing chart and measure both calf and thigh circumferences for accuracy. Another mistake is wearing the sleeve for too long without breaks. Compression should support circulation, not replace natural muscle function. Extended use, especially while sleeping or sitting for long periods, can lead to numbness or mild swelling. Most experts recommend limiting continuous wear to 3–4 hours unless medically advised. Users also often ignore skin irritation or discomfort, assuming it’s normal.
Redness, itching, or chafing usually indicates poor fit, low-quality stitching, or trapped moisture. Taking breaks, choosing breathable fabrics, and ensuring a proper wash routine can prevent this. Lastly, not washing compression sleeves regularly can affect both hygiene and elasticity. Sweat and oils break down fabric fibers, reducing compression effectiveness over time.
Ideally, sleeves should be washed after every few uses using mild detergent and air-dried to preserve shape and pressure integrity. By avoiding these mistakes, you’ll not only extend the lifespan of your compression sleeve but also maintain optimal recovery performance and comfort every time you wear it.
How to Clean and Maintain Your Compression Sleeve
Cleaning and maintaining your full leg compression sleeve properly is key to preserving its elasticity, comfort, and recovery benefits. Over time, sweat, body oils, and dirt can weaken the fibers, reducing compression strength and causing odor buildup. A simple yet consistent cleaning routine keeps your sleeve fresh, durable, and effective.
Step-by-step cleaning process:
- Read the label first: Each brand has specific care guidelines. Some sleeves can be machine-washed, while others require hand washing.
- Use cold or lukewarm water: Heat can damage elastic fibers and affect compression levels.
- Choose mild, non-bleach detergent: Strong chemicals can weaken the fabric. Look for gentle sportswear detergents such as HEX Performance or Woolite Sports.
- Hand wash or gentle cycle: If you use a washing machine, place the sleeve in a mesh laundry bag to protect it from friction and stretching.
- Rinse thoroughly: Make sure no detergent residue remains, as it can irritate the skin.
- Air dry only: Never tumble dry. Lay the sleeve flat or hang it in a shaded area to preserve elasticity and prevent shrinkage.
Tips to maintain elasticity:
- Avoid twisting or wringing out water. Instead, press gently between towels.
- Keep sleeves away from direct sunlight or heaters during drying.
- Rotate between two pairs if you wear them daily. This allows each pair to regain shape and stretch evenly.
- Store them flat or rolled not folded to avoid creases that may reduce compression consistency.
When to replace an old sleeve:
A high-quality compression sleeve typically lasts six to twelve months with regular use. Replace your sleeve if:
- The compression feels noticeably weaker.
- The fabric has stretched out or developed thin spots.
- It no longer stays snug or slips down easily.
- There’s visible damage, pilling, or loss of elasticity at the top bands.
Proper care extends your sleeve’s lifespan, maintains performance, and prevents irritation from residue or bacteria buildup all essential for a smooth, hygienic recovery routine.
Real User Experiences
Real-world feedback often tells you more about a product’s performance than lab data or marketing claims. Full leg compression sleeves have become essential tools for athletes, fitness enthusiasts, and even individuals recovering from surgery and their stories reveal how powerful consistent use can be when done correctly.
A runner’s recovery story:
Maria, a marathon runner from Chicago, struggled with post-race soreness that lasted for days. After switching to the CEP Full Leg Compression Sleeve, she noticed significant improvement. “I started wearing them right after long runs. The next day, my legs didn’t feel as heavy, and I could train again sooner,” she said. For endurance athletes like her, maintaining circulation and reducing fatigue made a measurable difference in performance recovery cycles.
A weightlifter’s performance boost:
Darius, a competitive lifter, began using the 2XU Recovery Compression Sleeve to manage post-leg-day soreness. “It’s not magic, but it absolutely helps. My quads recover faster, and I can squat heavy again without that lingering stiffness,” he explained. He uses his sleeves after training and during warmups to keep his muscles primed and oxygenated.
Post-surgery recovery experience:
Elaine, who underwent ACL surgery, found the McDavid Full Leg Compression Sleeve instrumental in regaining mobility. “It gave me stability and comfort without restricting movement. My swelling was noticeably lower when I wore it,” she shared. For those in rehabilitation, controlled compression can reduce edema and promote faster healing when used alongside physical therapy.
These examples illustrate that while every user’s goal differs from improved blood flow to reduced swelling or muscle fatigue the benefits of using a full leg compression sleeve are consistently positive when matched with proper fit and routine care.
Final Thought
Full leg compression sleeves aren’t just workout accessories they’re practical recovery tools that help your muscles heal, reduce swelling, and keep you training consistently. Whether you’re an athlete, a weekend warrior, or recovering from an injury, using the right sleeve makes a noticeable difference in how quickly your legs bounce back. The key is smart use. Pick the correct size, follow care instructions, and don’t overdo the wear time.
A sleeve that fits snugly but comfortably will support blood flow, minimize soreness, and protect against fatigue without cutting circulation. Small habits like proper cleaning and rotation between pairs go a long way in preserving their effectiveness. If you’re consistent, you’ll start to feel the payoff better recovery, improved endurance, and less next-day stiffness. Think of compression sleeves as your silent partner in recovery: always working in the background so you can focus on moving forward stronger and pain-free.
FAQs
Are full leg compression sleeves better than calf sleeves?
Full leg compression sleeves provide broader muscle support by covering the thighs, knees, and calves, whereas calf sleeves target only the lower leg. If your goal is full recovery after intense leg workouts or running, full leg sleeves are generally more effective because they improve circulation across the entire limb. Calf sleeves, on the other hand, are lighter and better suited for targeted compression during shorter runs or gym sessions.
How tight should a compression sleeve feel?
A compression sleeve should feel snug but never painful. It should apply even pressure from the ankle upward, without cutting off blood flow or leaving deep marks. If you can slip two fingers under the fabric comfortably, that’s typically a good fit. Too tight, and circulation is compromised; too loose, and the sleeve loses its purpose.
Can I sleep in a compression sleeve?
It’s generally not recommended to sleep in a compression sleeve unless your doctor advises it. While it’s great for improving circulation during the day, wearing it overnight can sometimes restrict movement or cause mild swelling if circulation slows in one position. Use it during waking hours, especially post-workout or when standing for long periods.
How long do compression sleeves last?
With regular use, most high-quality full leg compression sleeves last 4 to 6 months before elasticity fades. Signs that it’s time to replace include loosened fabric, uneven pressure, or visible wear at the seams. Washing according to care instructions and air-drying can extend their lifespan by several months.
Are compression sleeves safe for everyone?
Compression sleeves are safe for most people, but individuals with vascular or heart conditions should consult a doctor before use. For healthy users, the main risk is incorrect sizing or overuse, which can lead to numbness or irritation. Always follow sizing charts and take short breaks between long wear sessions.
-
 Fitness2 months ago
Why New Balance Running Shoes Are the Perfect Fit for Your Feet
-
 Sports Products2 months ago
Brooks Running Shoes Reviewed: Comfort, Support, and Speed
-
 Sports Products2 months ago
Top 10 Best Shoes for Hyrox to Boost Your Race Performance
-
 Fitness2 months ago
Best Training Routines for Explosive Sports Legs
-
 Sports Products2 months ago
Why the Nike Hyperko 2 Is the Top Pick for Serious Fighters
-
 Health2 months ago
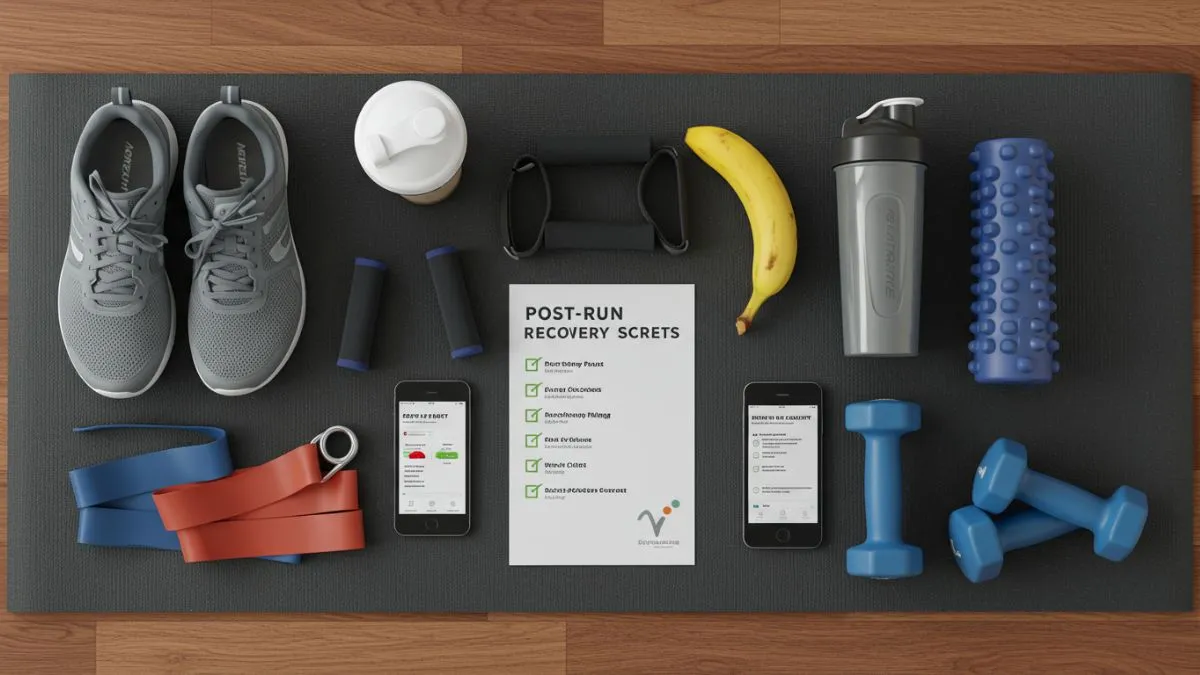
Post Run Recovery Secrets: How to Heal Faster and Run Stronger
-
 Sports Products2 months ago
Top 10 Running Shoes of 2025: Comfort, Speed, and Style Combined
-
 Sports Products2 months ago
Asics Novablast 5 Review: Best Running Shoes 2025